Sandbox or Live Mode?
Regardless of whether you choose Stripe or PayPal as your primary payment processor, moving directly from a fresh installation to a live production environment is highly discouraged. Transitioning into "Live Mode" without rigorous simulation exposes your digital storefront to immense operational risks, such as failed server handshakes, unverified webhook endpoints, or silent email delivery blockades. Utilizing the official, isolated sandbox environments provided by your chosen payment processor ensures that your server architecture behaves exactly as expected under realistic checkout conditions before any real currency changes hands.
To streamline the initial stages of web design, the RT Digital Downloads suite includes a built-in, native "Test Gateway." This internal option is an invaluable asset during the embryonic phases of your project. It allows you to immediately observe how the Buy Button processes forms, how the backend executes success page redirects, and how the Order Dashboard renders mock analytics grids. It provides a zero-configuration environment directly inside your RapidWeaver canvas, making it the perfect tool for initial component familiarization, structural styling, and visual workspace debugging.
However, it is absolutely critical to understand that this internal Test Gateway is not a substitute for the official testing pipelines offered by Stripe or PayPal. The native Test Gateway operates entirely in a simulated vacuum; it completely bypasses external server-to-server network queries, cryptographic signature verifications, and asynchronous timing loops. It cannot replicate how Stripe’s signing secrets (whsec_) authenticate an incoming payload, nor can it stress-test PayPal's advanced four-stage IPN anti-fraud validation pipeline against live server restrictions or web host firewalls.
Consequently, a secure and professional deployment workflow must always adhere to a strict three-step lifecycle. First, employ the native Test Gateway to finalize your visual layout, adjust dropzones, and refine text typography. Second, transition to the official Stripe Test Mode or PayPal Sandbox network to rigorously validate real server-to-server webhook connectivity, file streaming integrity, and script permissions. Only when this end-to-end pipeline proves flawless should you safely flip the switch to Live Mode for production.
Stripe Setup & Webhooks Integration
Integrating Stripe into your RT Digital Downloads ecosystem provides your customers with a world-class, frictionless checkout experience. However, because modern payment gateways prioritize security and speed, configuring Stripe correctly requires setting up Webhooks.
While this might sound highly technical, it is a straightforward process once you understand the underlying mechanics.
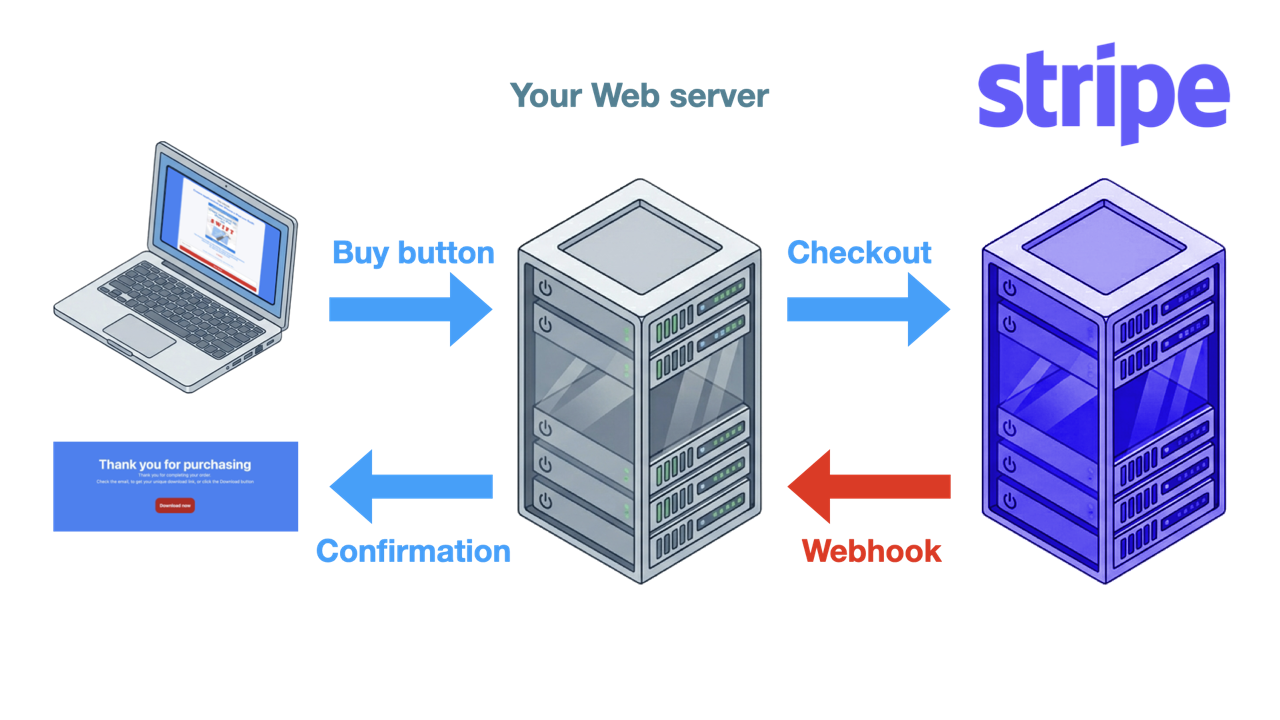
Essentially, a webhook is an automated message sent from one website (or app) to another when something happens. In this case, instead of your website constantly checking if a customer has paid, Stripe automatically "knocks on your server's door" to announce that a payment was successful.
The "Why" Behind Webhooks: Asynchronous Security
In older, less secure e-commerce systems, a storefront relied on the customer's browser being redirected to a "Success Page" to trigger the file delivery. This is incredibly dangerous. If a customer closed their browser too quickly after paying, or if their internet dropped, the shop would never know they paid, resulting in a lost order and a frustrated buyer.
To solve this, Stripe processes transactions asynchronously. When a user pays, Stripe's servers bypass the customer's browser entirely and send a direct, silent, server-to-server message (the Webhook) to your backend architecture. Your webhook_stripe.php script listens for this message 24/7. This guarantees that your JSON database logs the payment instantly and securely, regardless of what the customer does on their screen.
Phase 1: Acquiring Your Primary API Keys
The first step is linking your RapidWeaver Elements Buy Button to your Stripe account.
- Log into your Stripe Dashboard (
https://dashboard.stripe.com). -
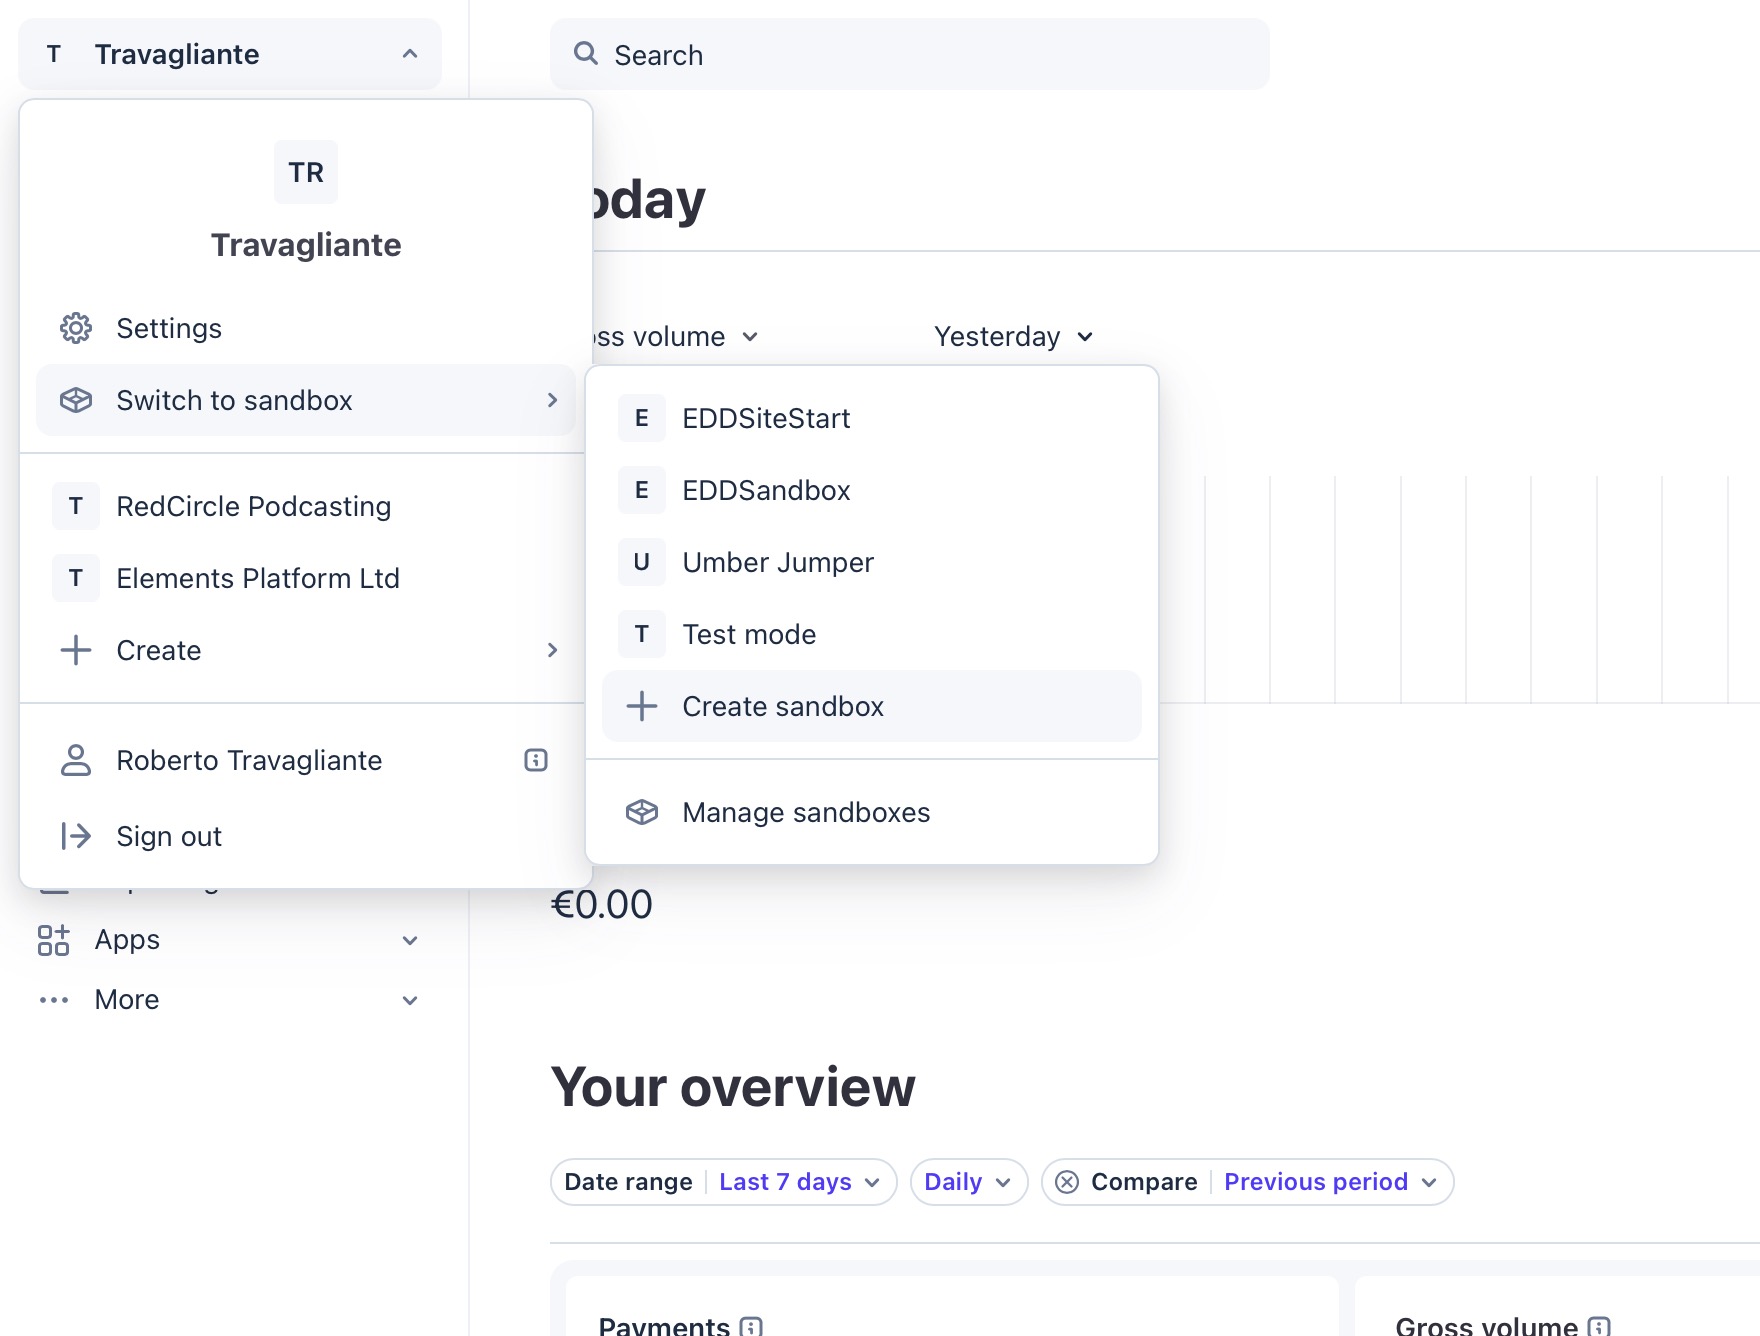
Look at the top left of your dashboard and, on your profile menu, create a new Sandbox (menu "Switch to sandbox" => "Create"), to enter "Test Mode". Always configure and test your shop in Test Mode before going live.
-
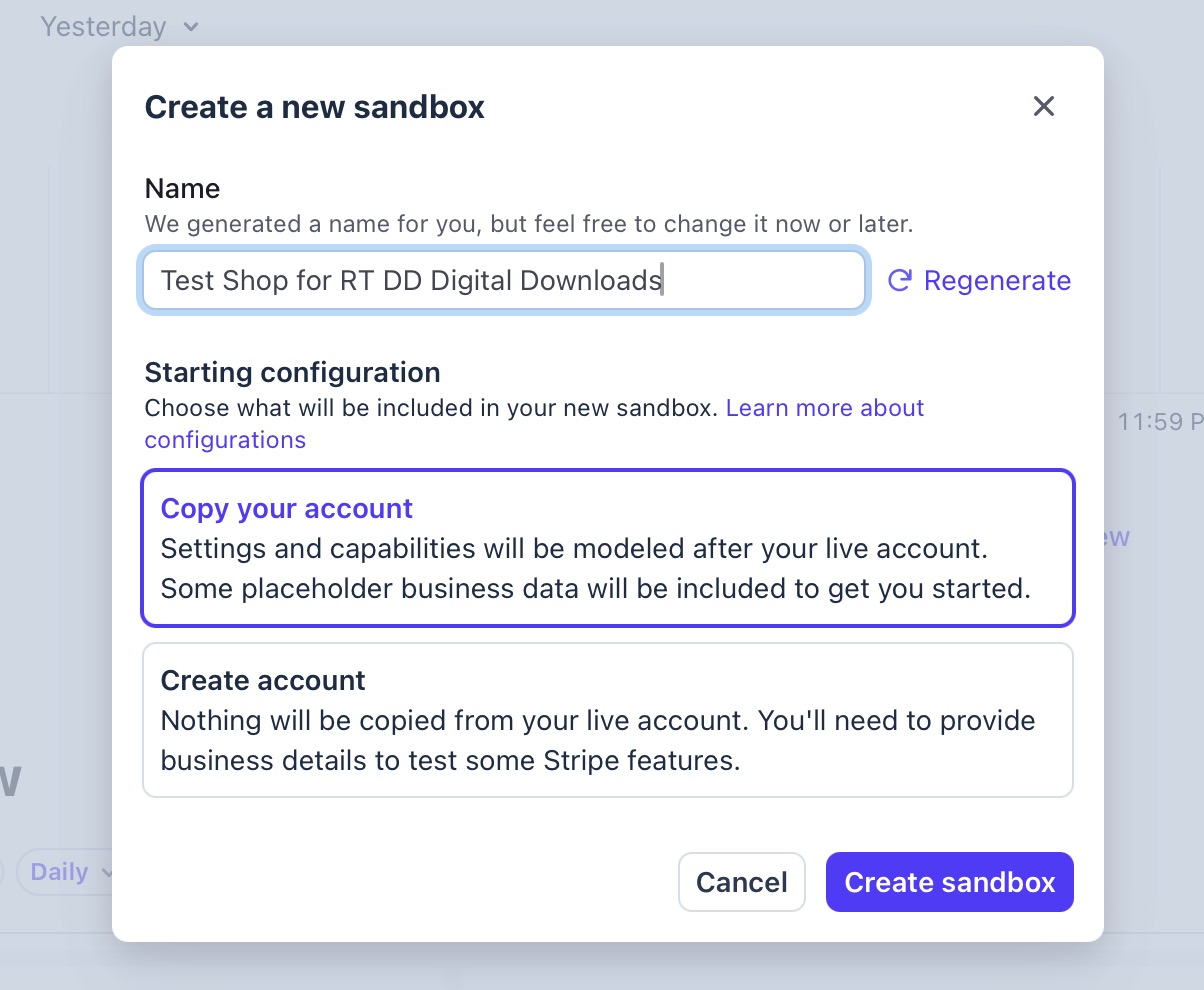
The following box will be shown. Just select "Copy your account" and click the "Create sandbox" button.
-
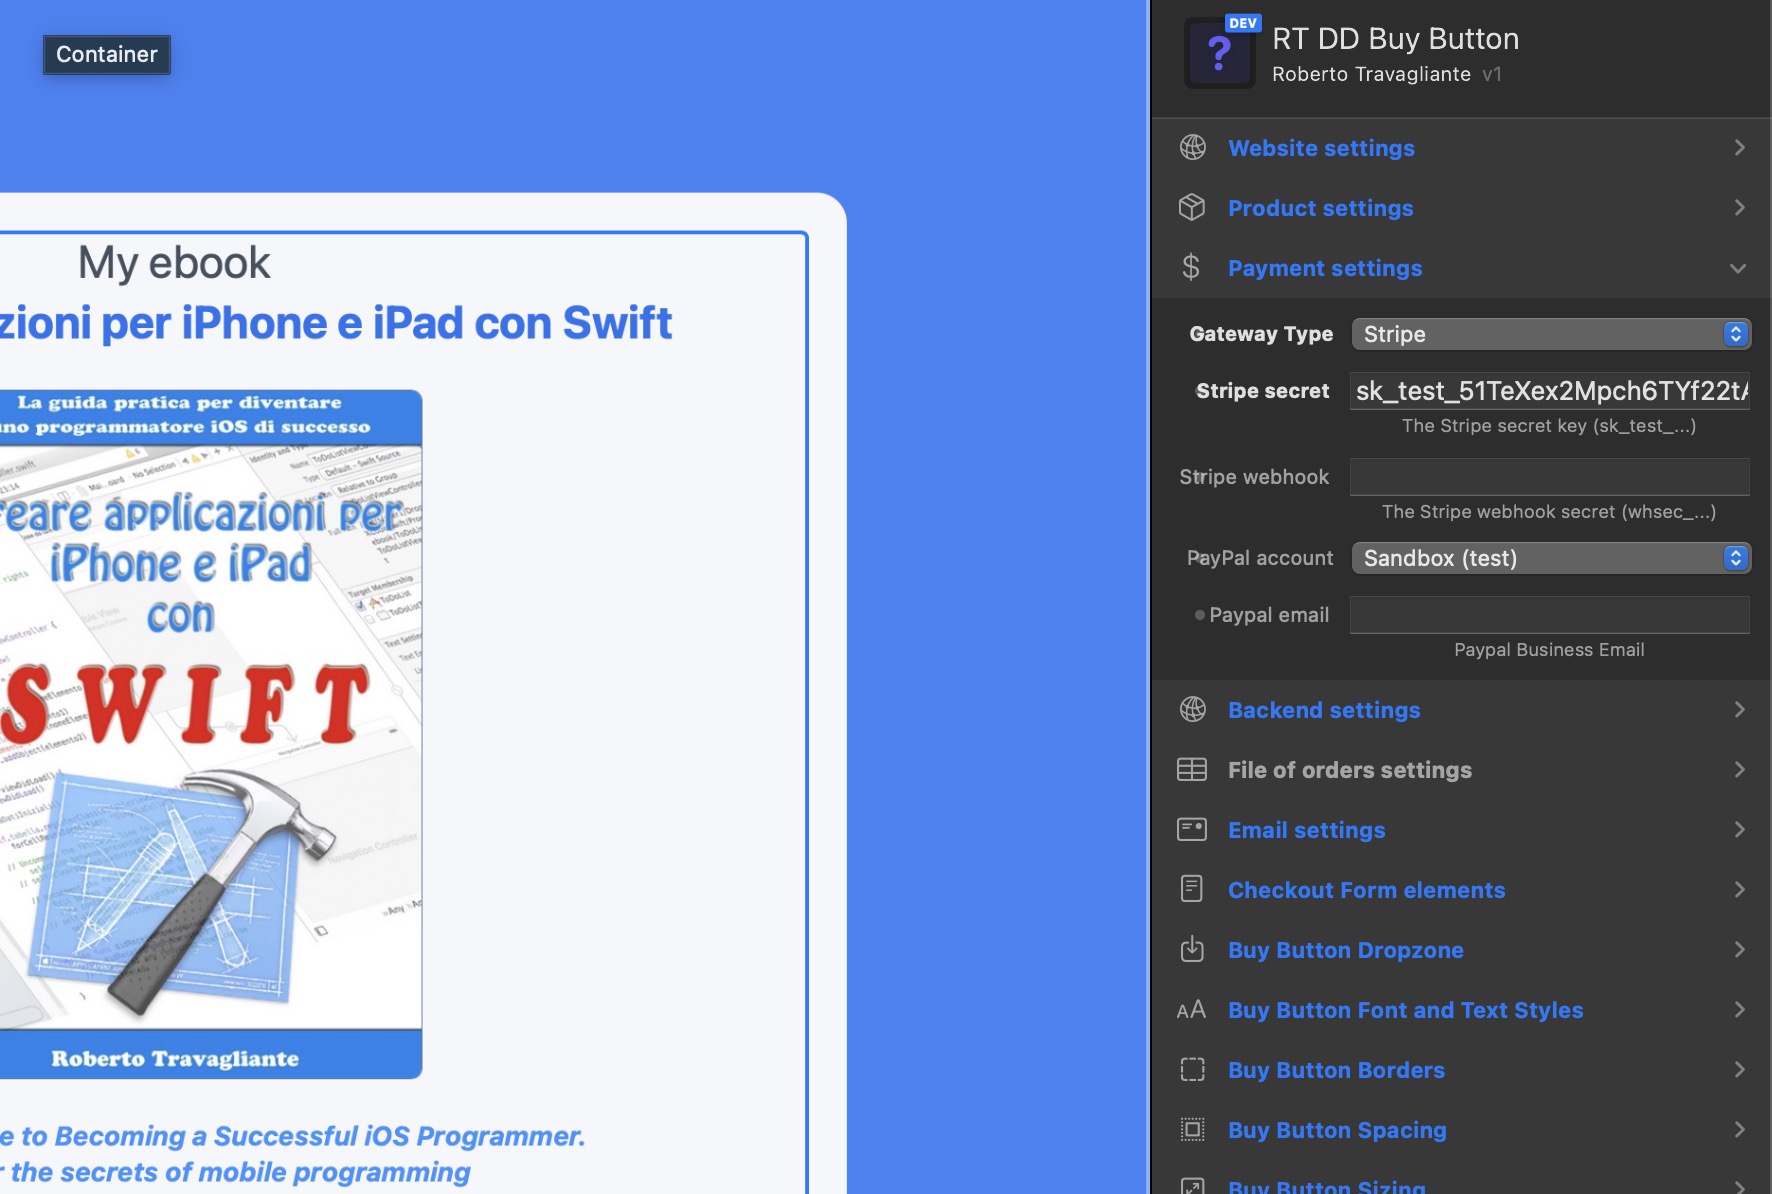
You will be redirected to your new Stripe Sandbox. Now, you will see your API Keys, on the right part of the screen. You will see two keys: a Publishable key and a Secret key. For RT Digital Downloads, you only need the Secret Key. So, click on the Secret Key, to copy your secret API key (it will start with
sk_test_in test mode, orsk_live_in production).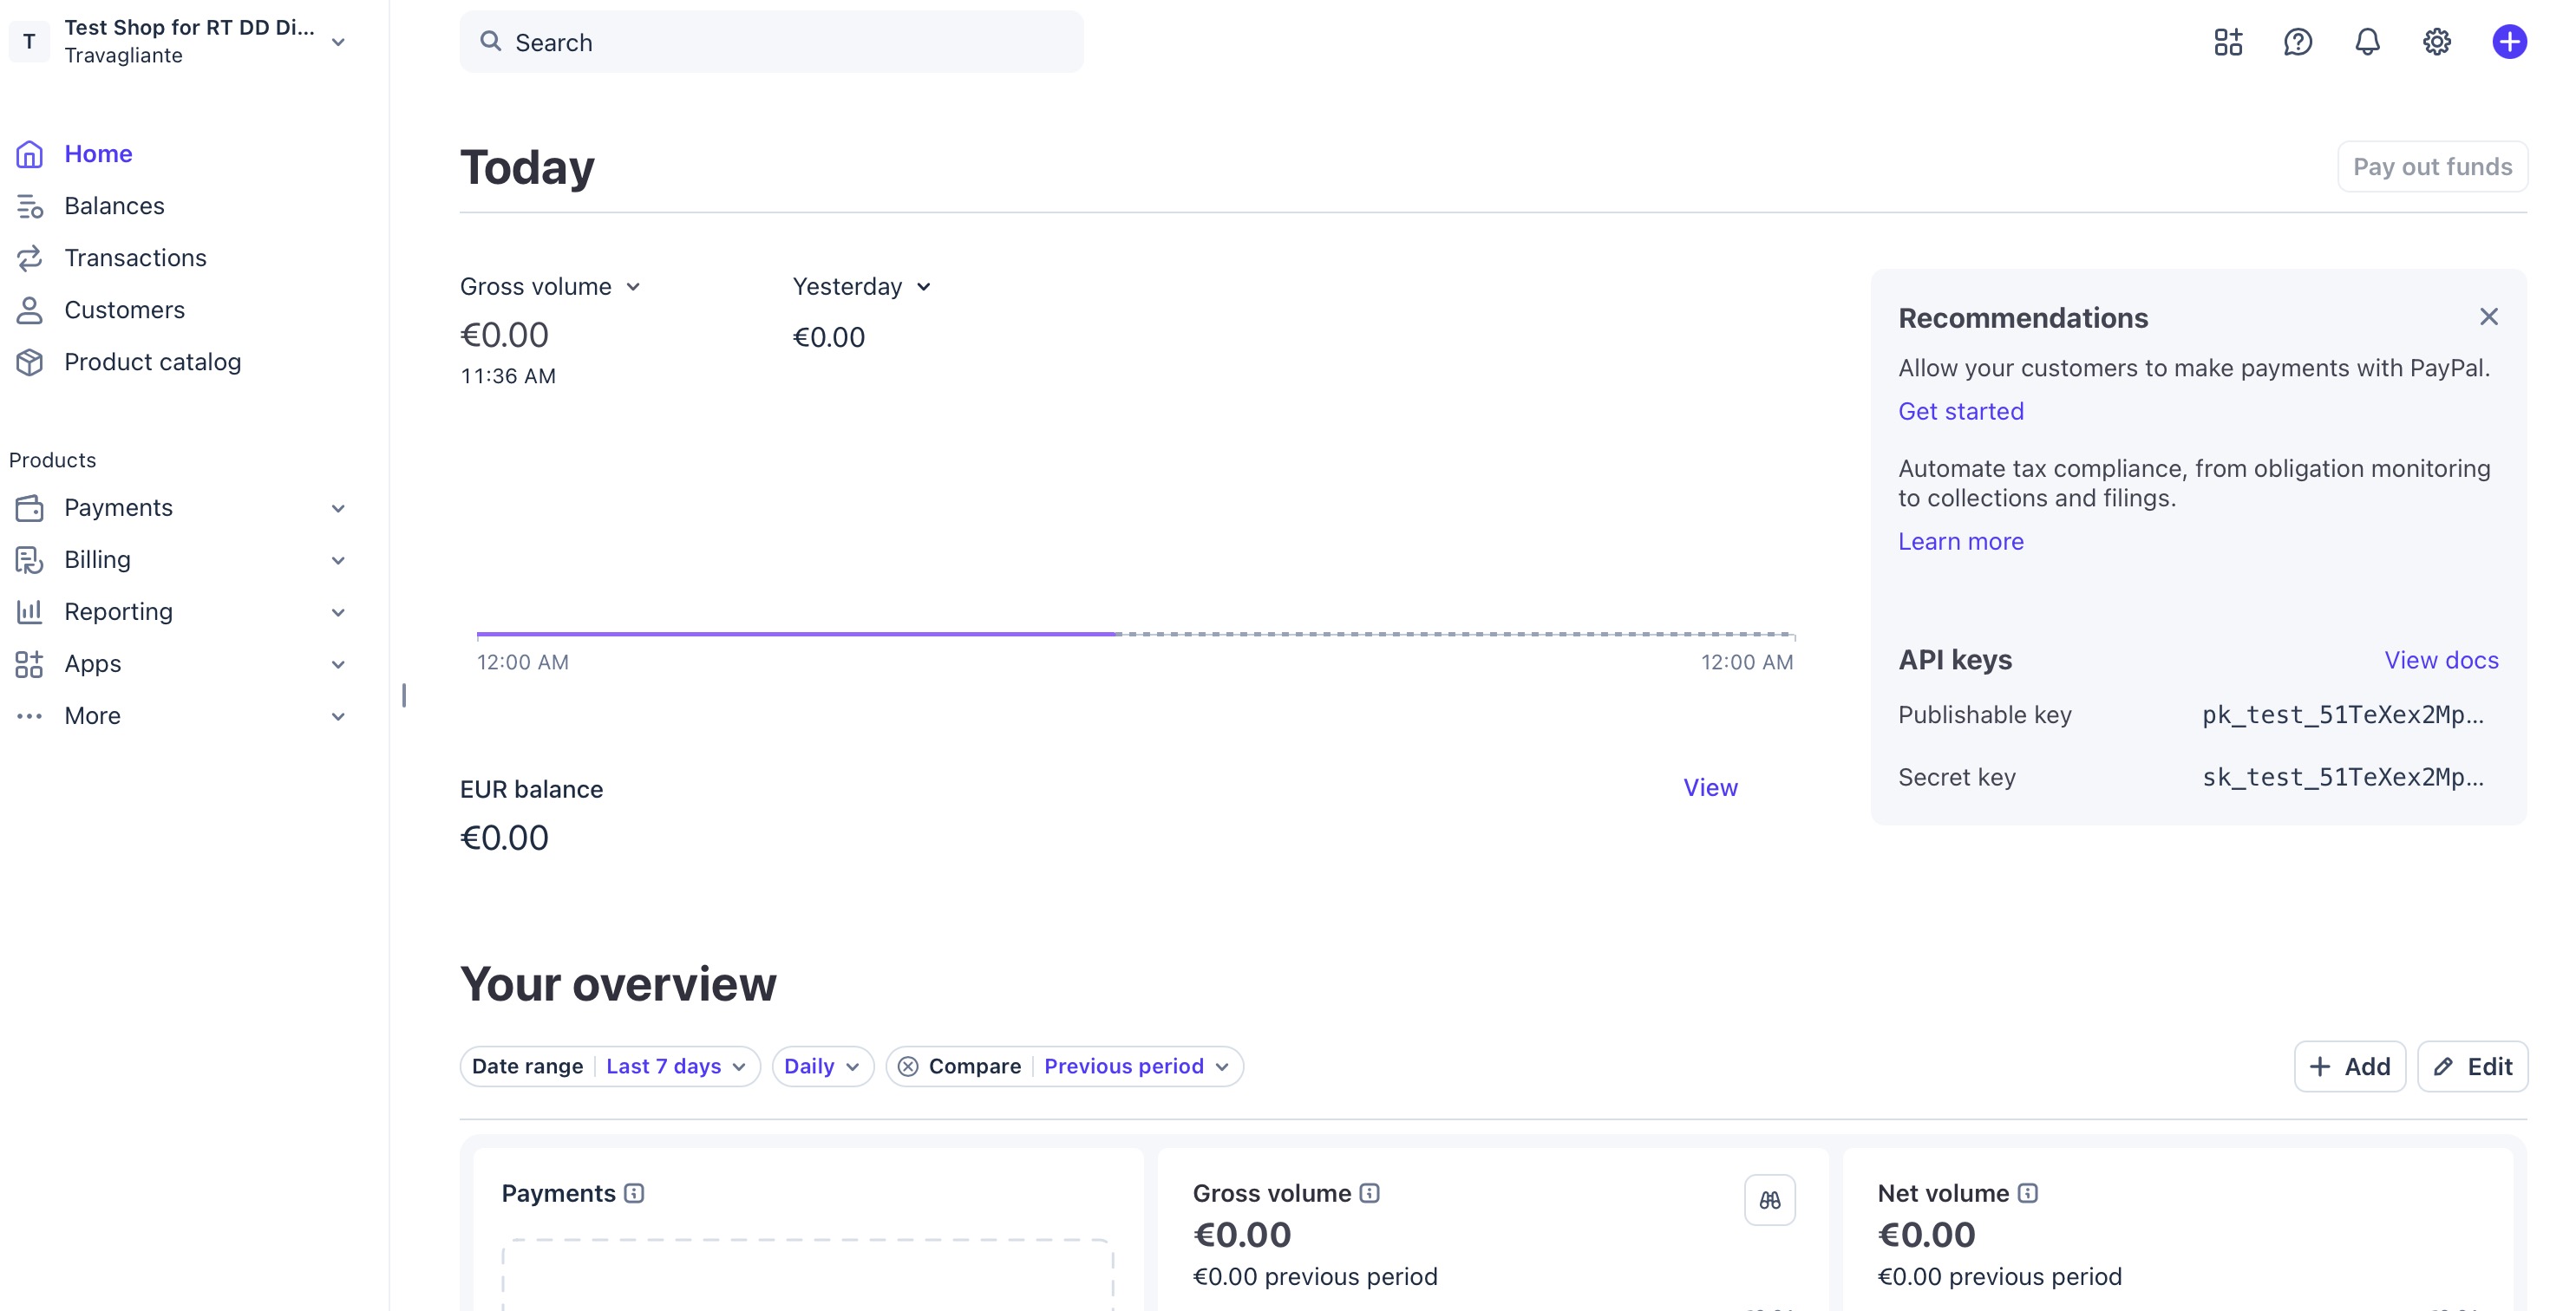
-
Copy this key and paste it directly into the Stripe secret property field inside your Buy Button's Elements Inspector.
Ok, you have configured the communication from our component to Stripe. Now, we must configure the configuration of the Webhook, so we can receive the confirmation of payments from Stripe.
Phase 2: Building the Webhook Listener Endpoint
Now, you must tell Stripe exactly where to send the payment confirmations on your server.
-
Go to the specific page on the Stripe Developers Dashboard, dedicated to the Webhooks:
https://dashboard.stripe.com/webhooks.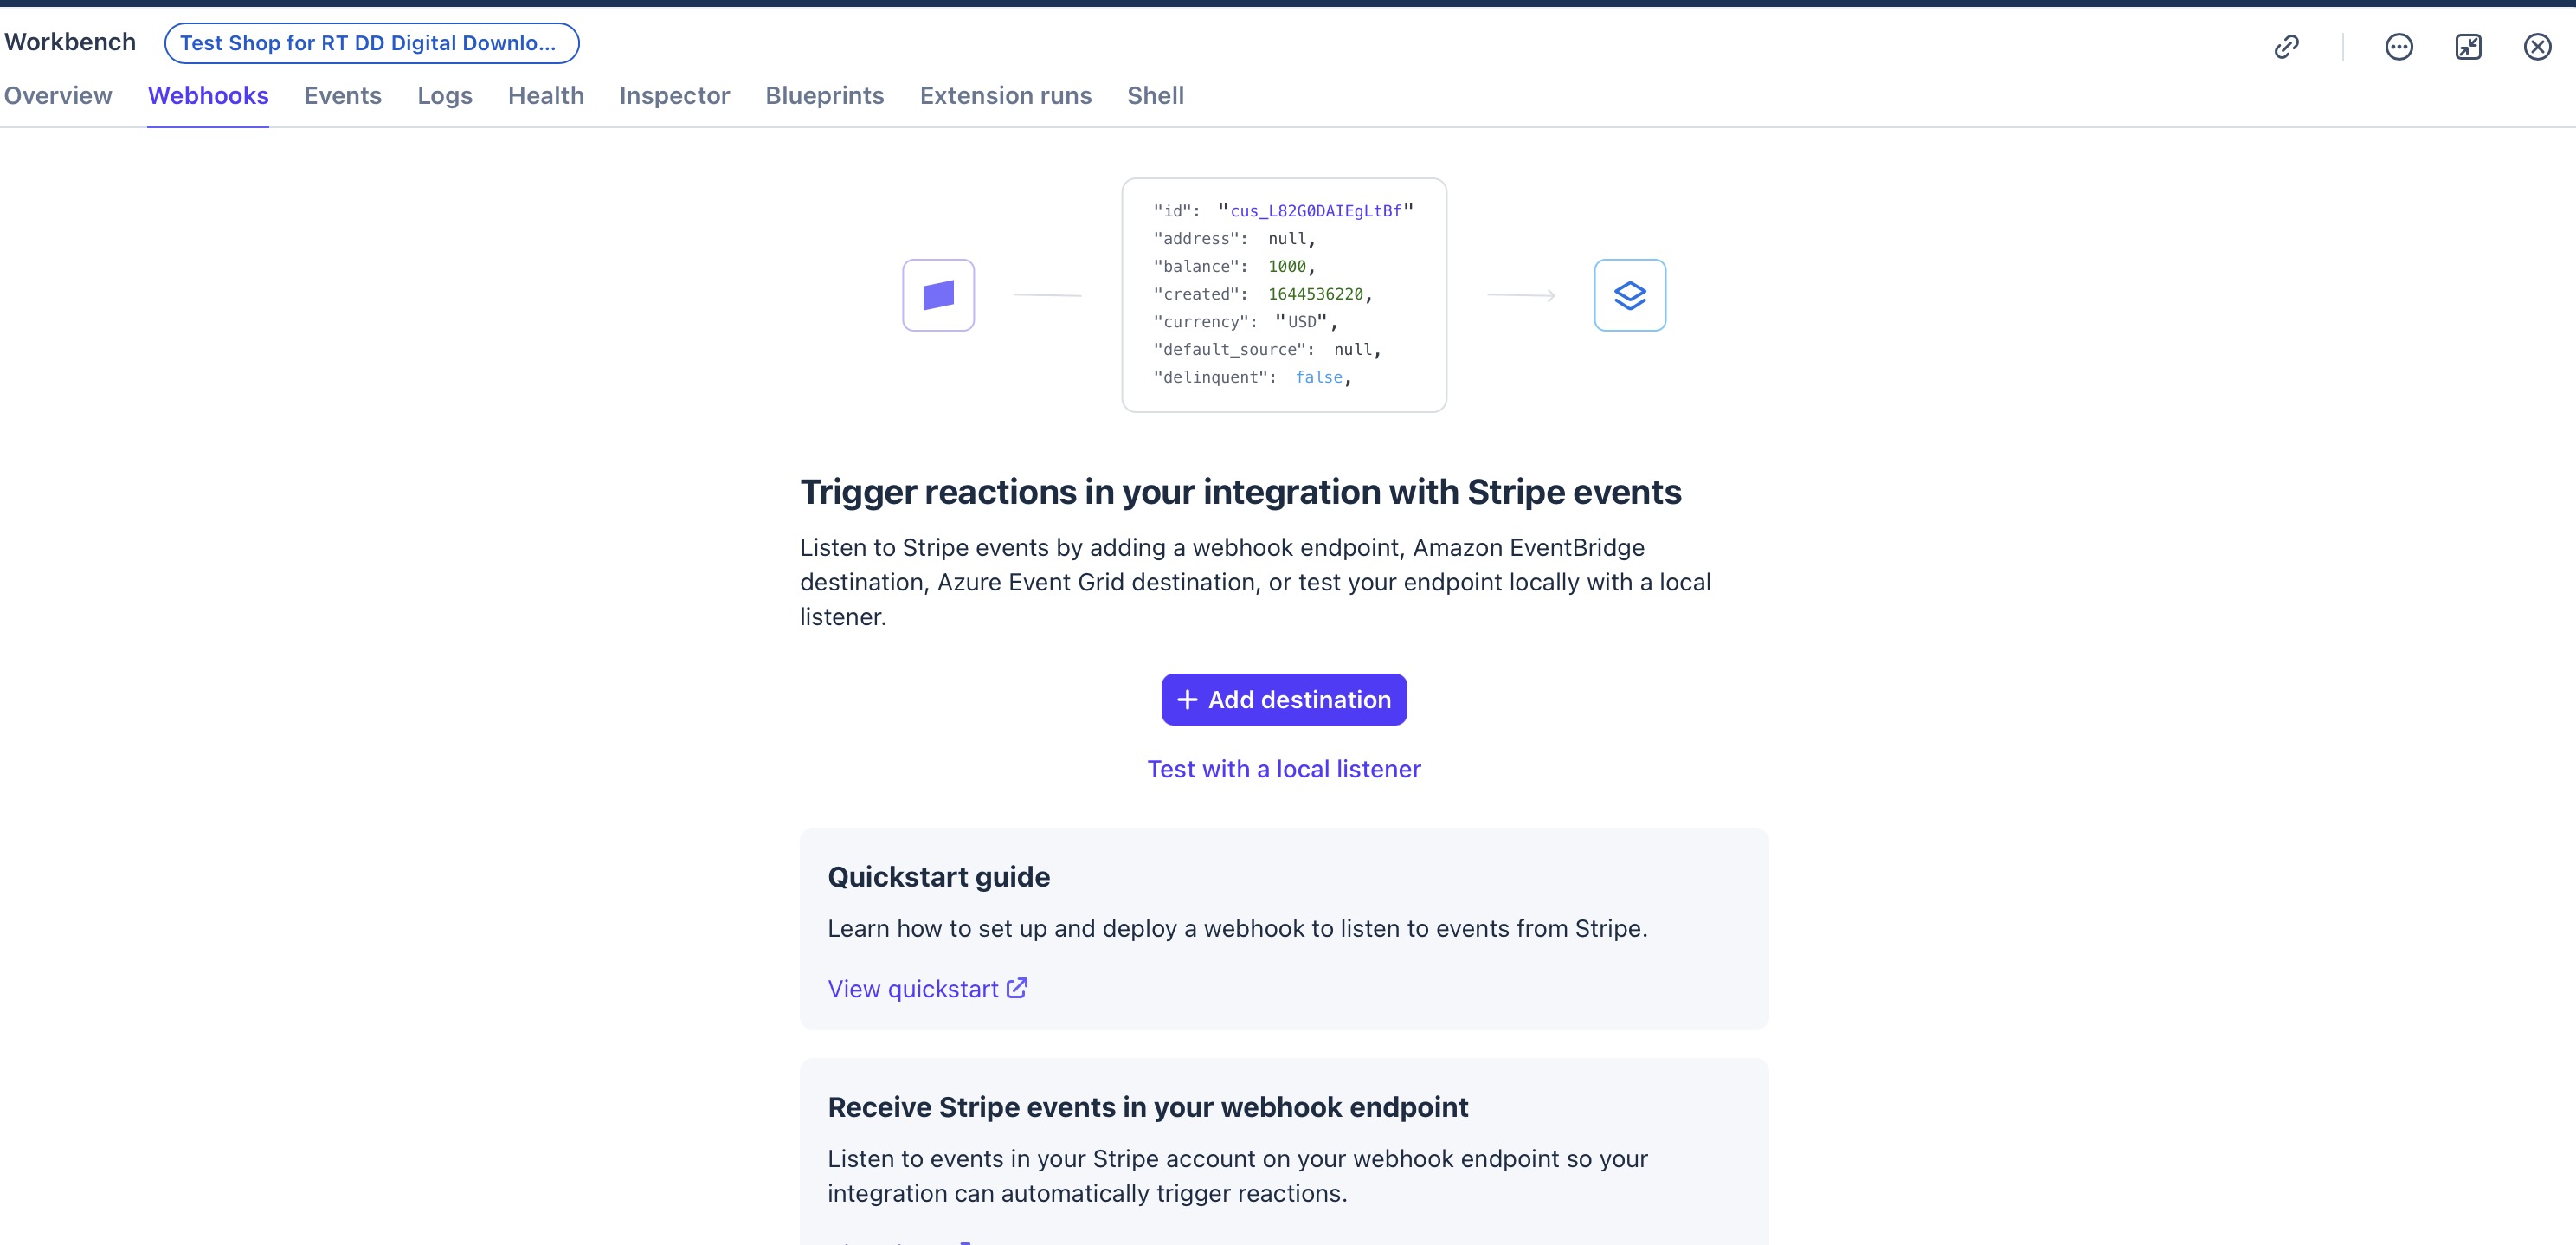
-
Now, you can choose to add a destination, or to test the payment flow with a local listener. If you want to use a local listener, then you must download the Stripe CLI (
https://stripe.com/docs/stripe-cli#install) and follow the instructions in the following image. Else, go to the next step.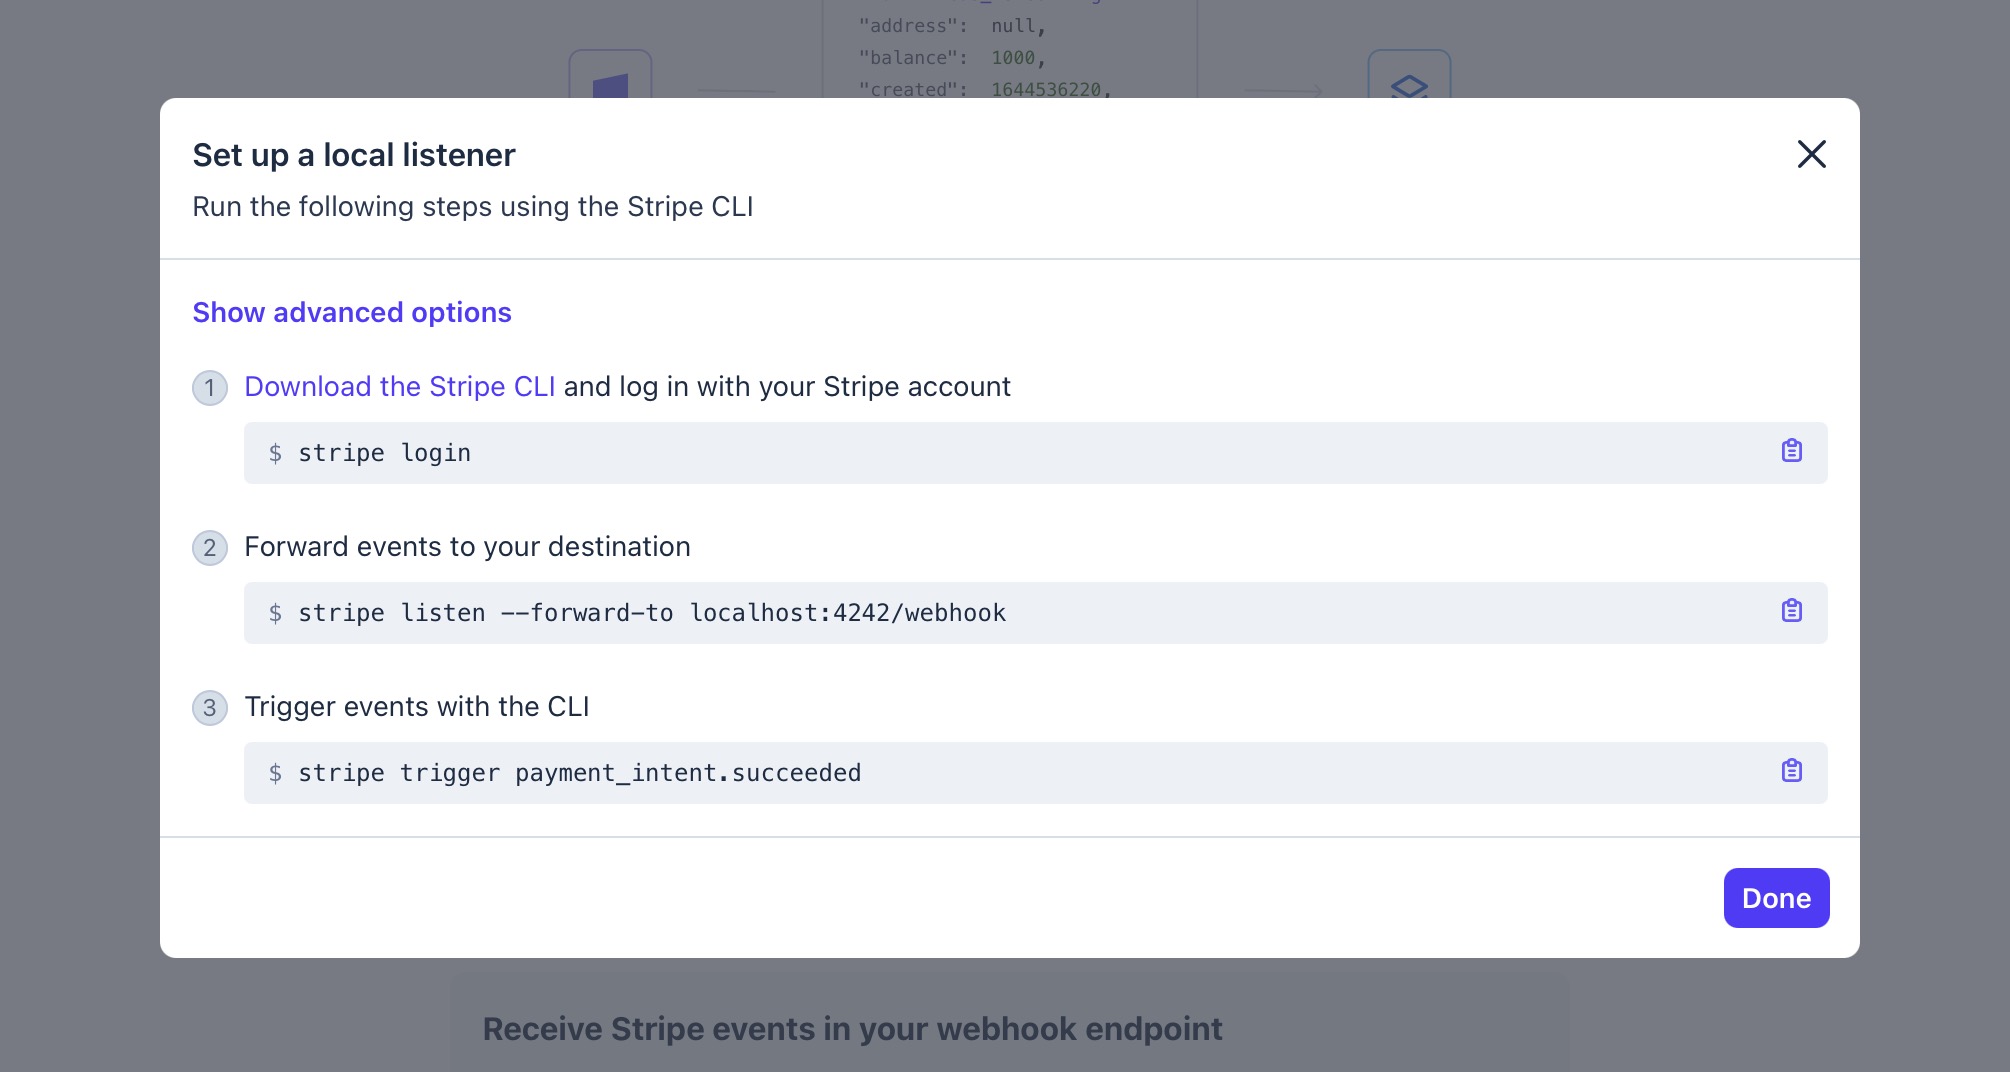 Please, note that if you want to test the Stripe payment flow on a local installation of your webserver (e.g. MAMP, or another local webserver), the local listener is the only method you can use.
 -
If you don't want to setup a local listener, but prefer a real destination on your server, then click the "Add destination" button. In the configuration screen, you must select the event
checkout.session.completed(that occurs when a Checkout Session has been successfully completed), under the group "Checkout". This event will be used to check when the payment has been completed, to complete the order on RT DD Digital Downloads. Finally, click "Continue".Important: Do not select any other events. Selecting multiple unnecessary events will flood your server with traffic it is not programmed to handle, potentially causing performance bottlenecks.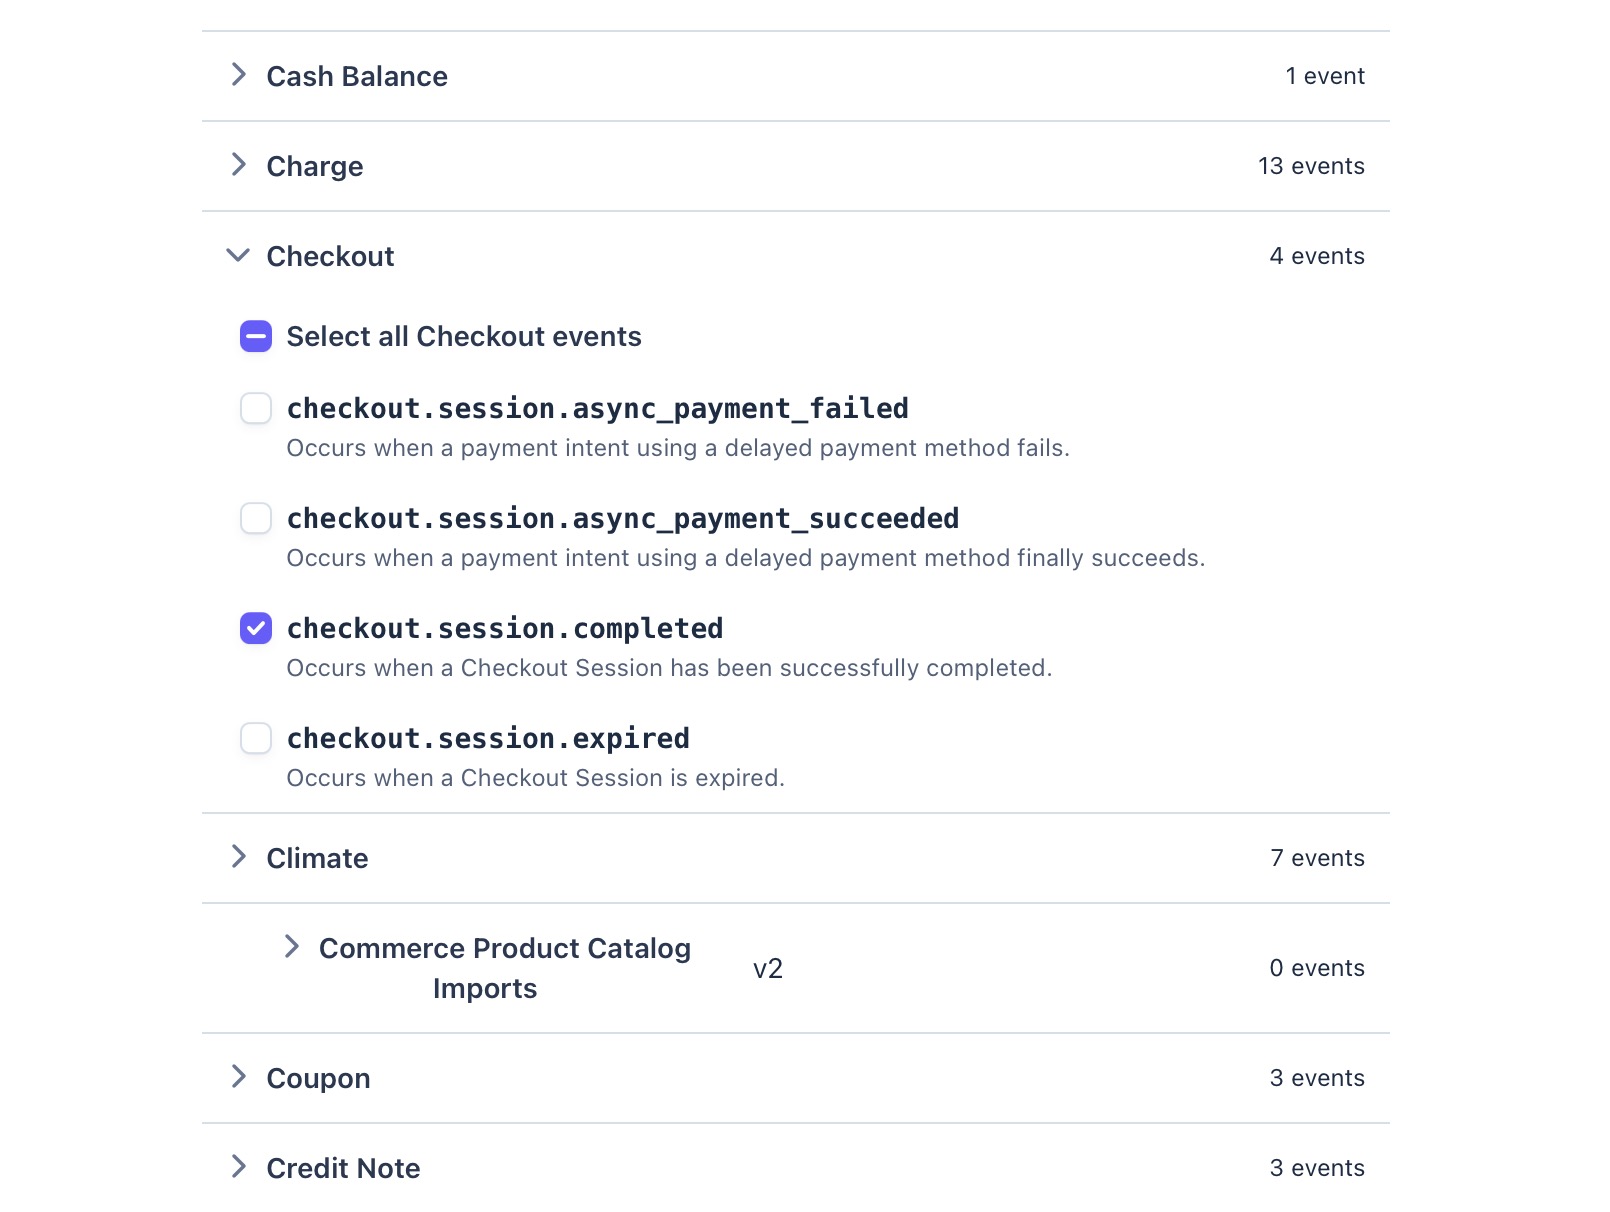
-
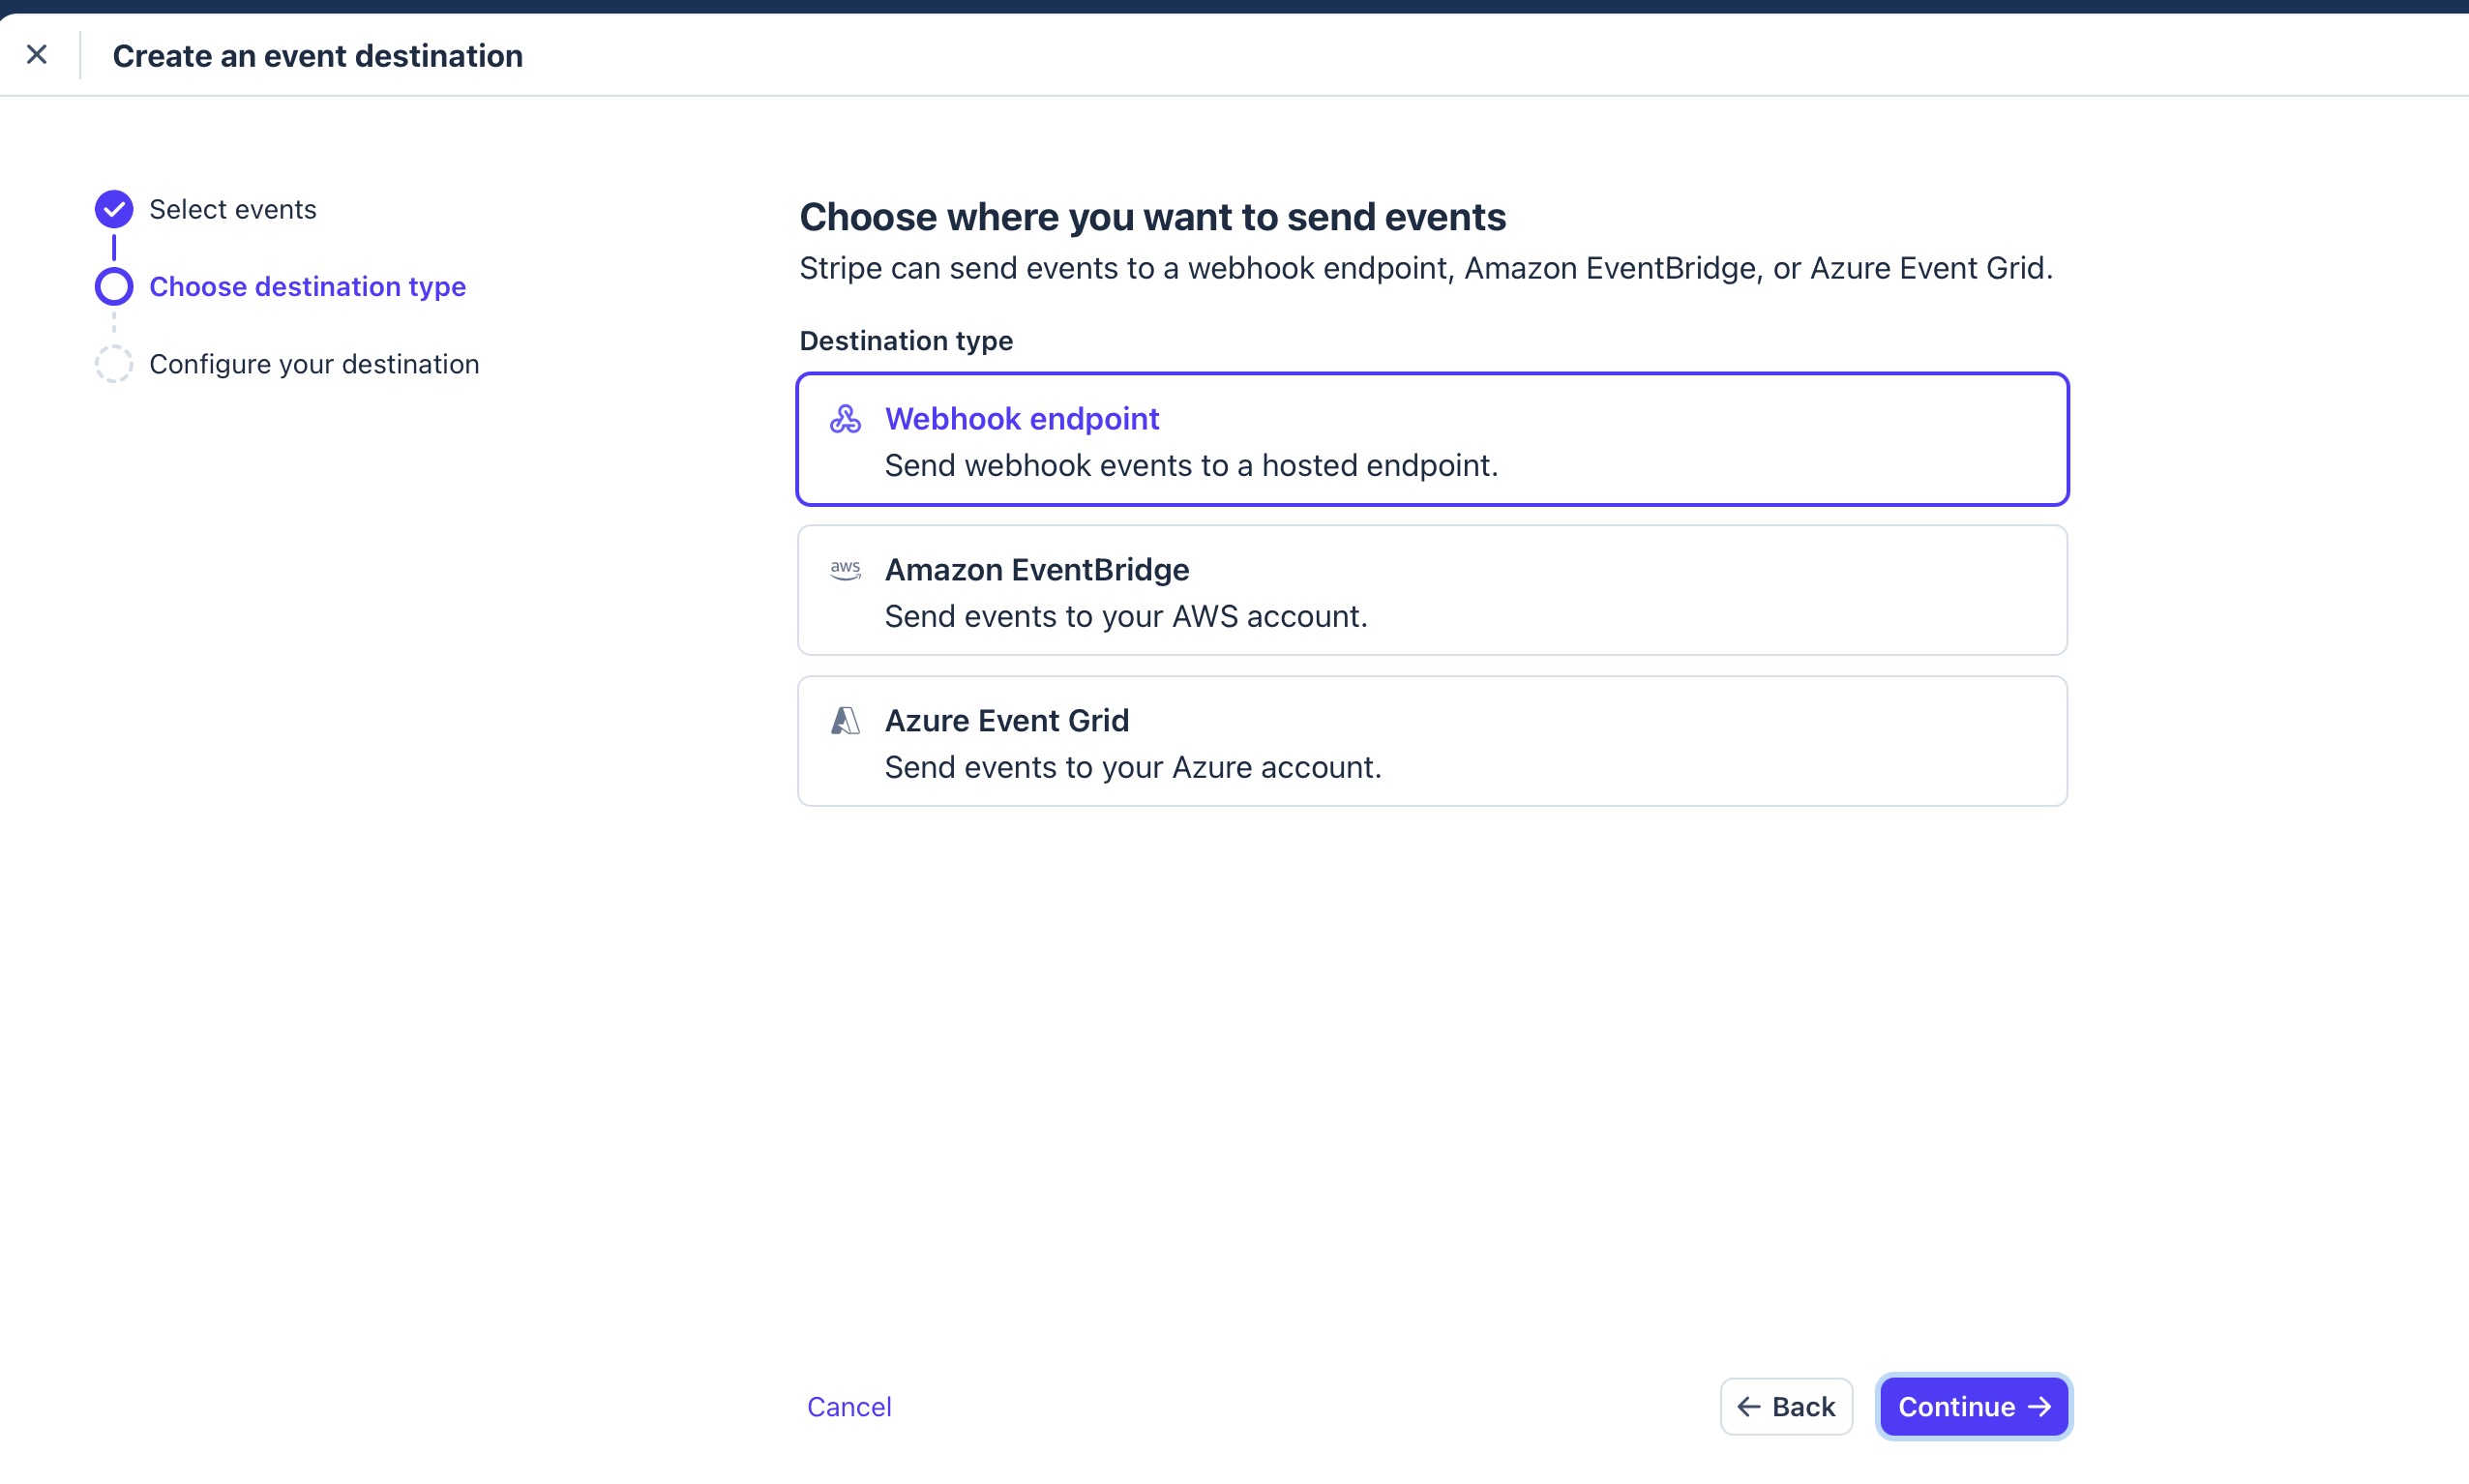
In the following screen, select "Webhook endpoint" and click "Continue".
-
In the following screen, titled "Configure destination", insert a destination name, the URL of your public website, where the
webhook_stripe.phpis located (for example:https://www.travagliante.com/shop-area/rw/elements/com.travagliante.rt_digital_downloads/php_backend/webhook_stripe.php). Finally, click on "Create destination". Important: For security reasons, the URL must use the HTTPS protocol.Critical Note: Replacehttps://www.travagliante.com/shop-area/with your actual Base URL. Ensure your website is running on a secure https:// connection, as Stripe will block webhooks sent to standard HTTP addresses.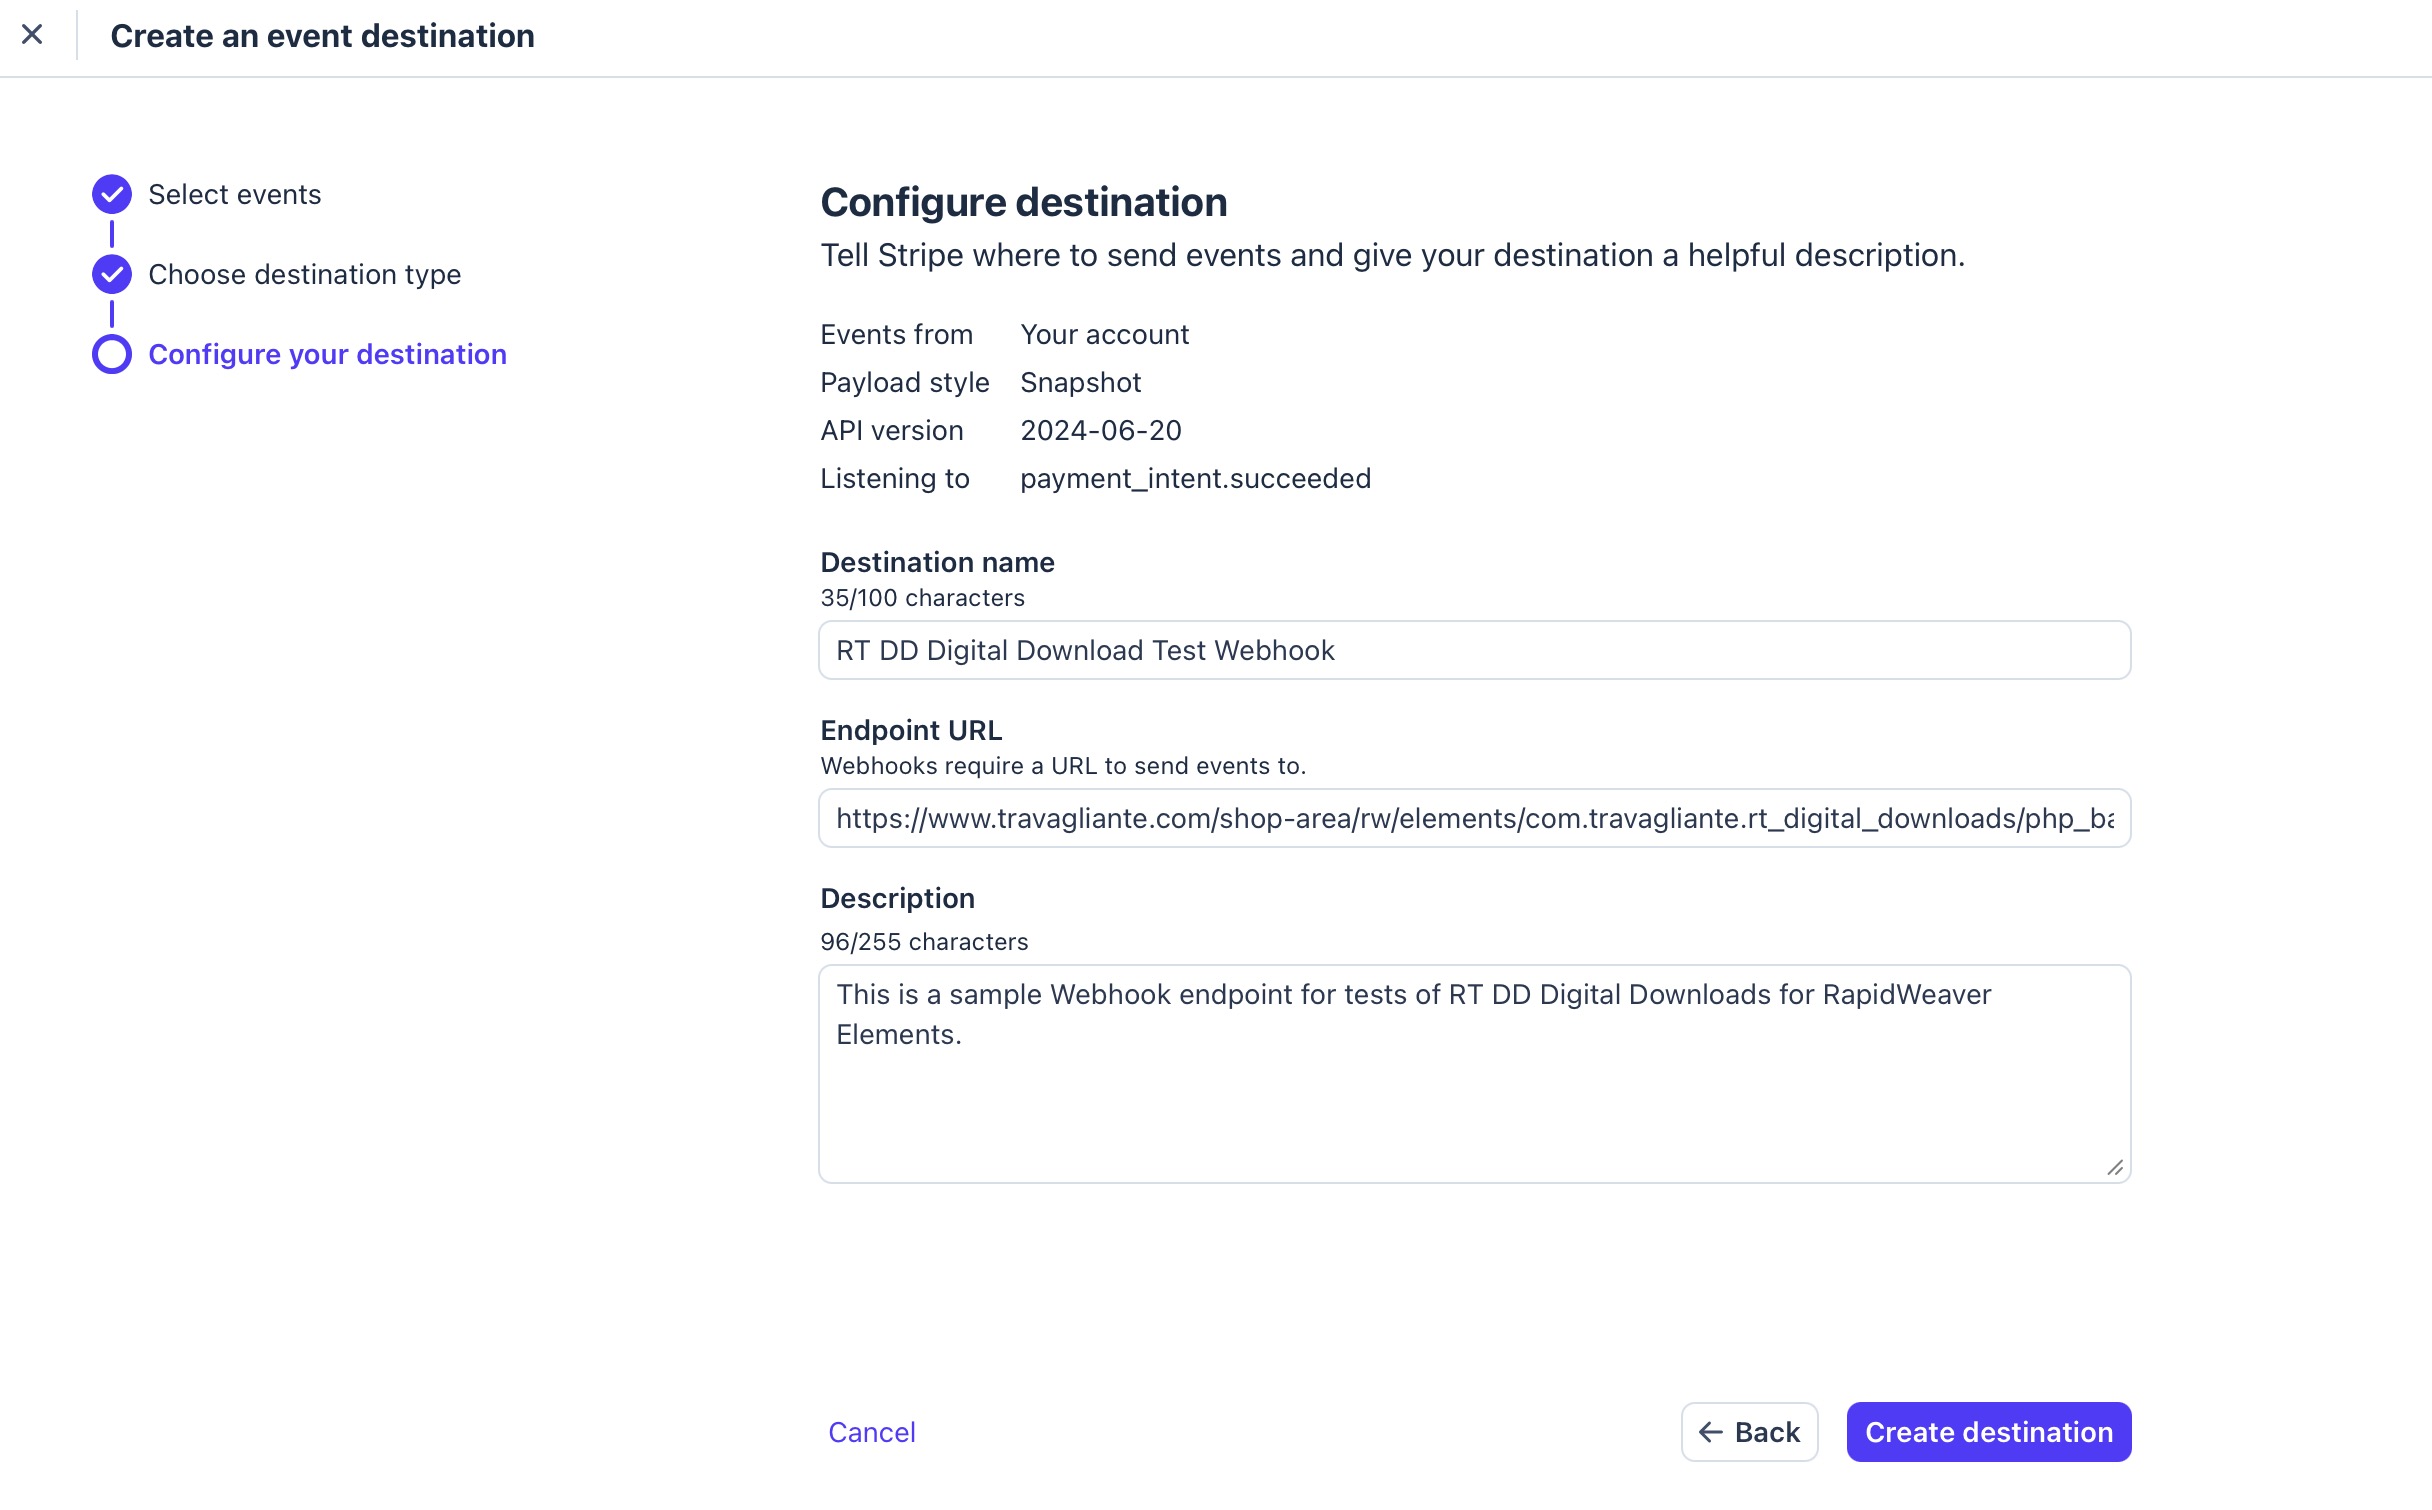
-
Ok, the Webhook is configured. Now, you must take note of the signing secret for your webhook. Click the eye icon ("Reveal secret") and copy the webhook secret
whsec_.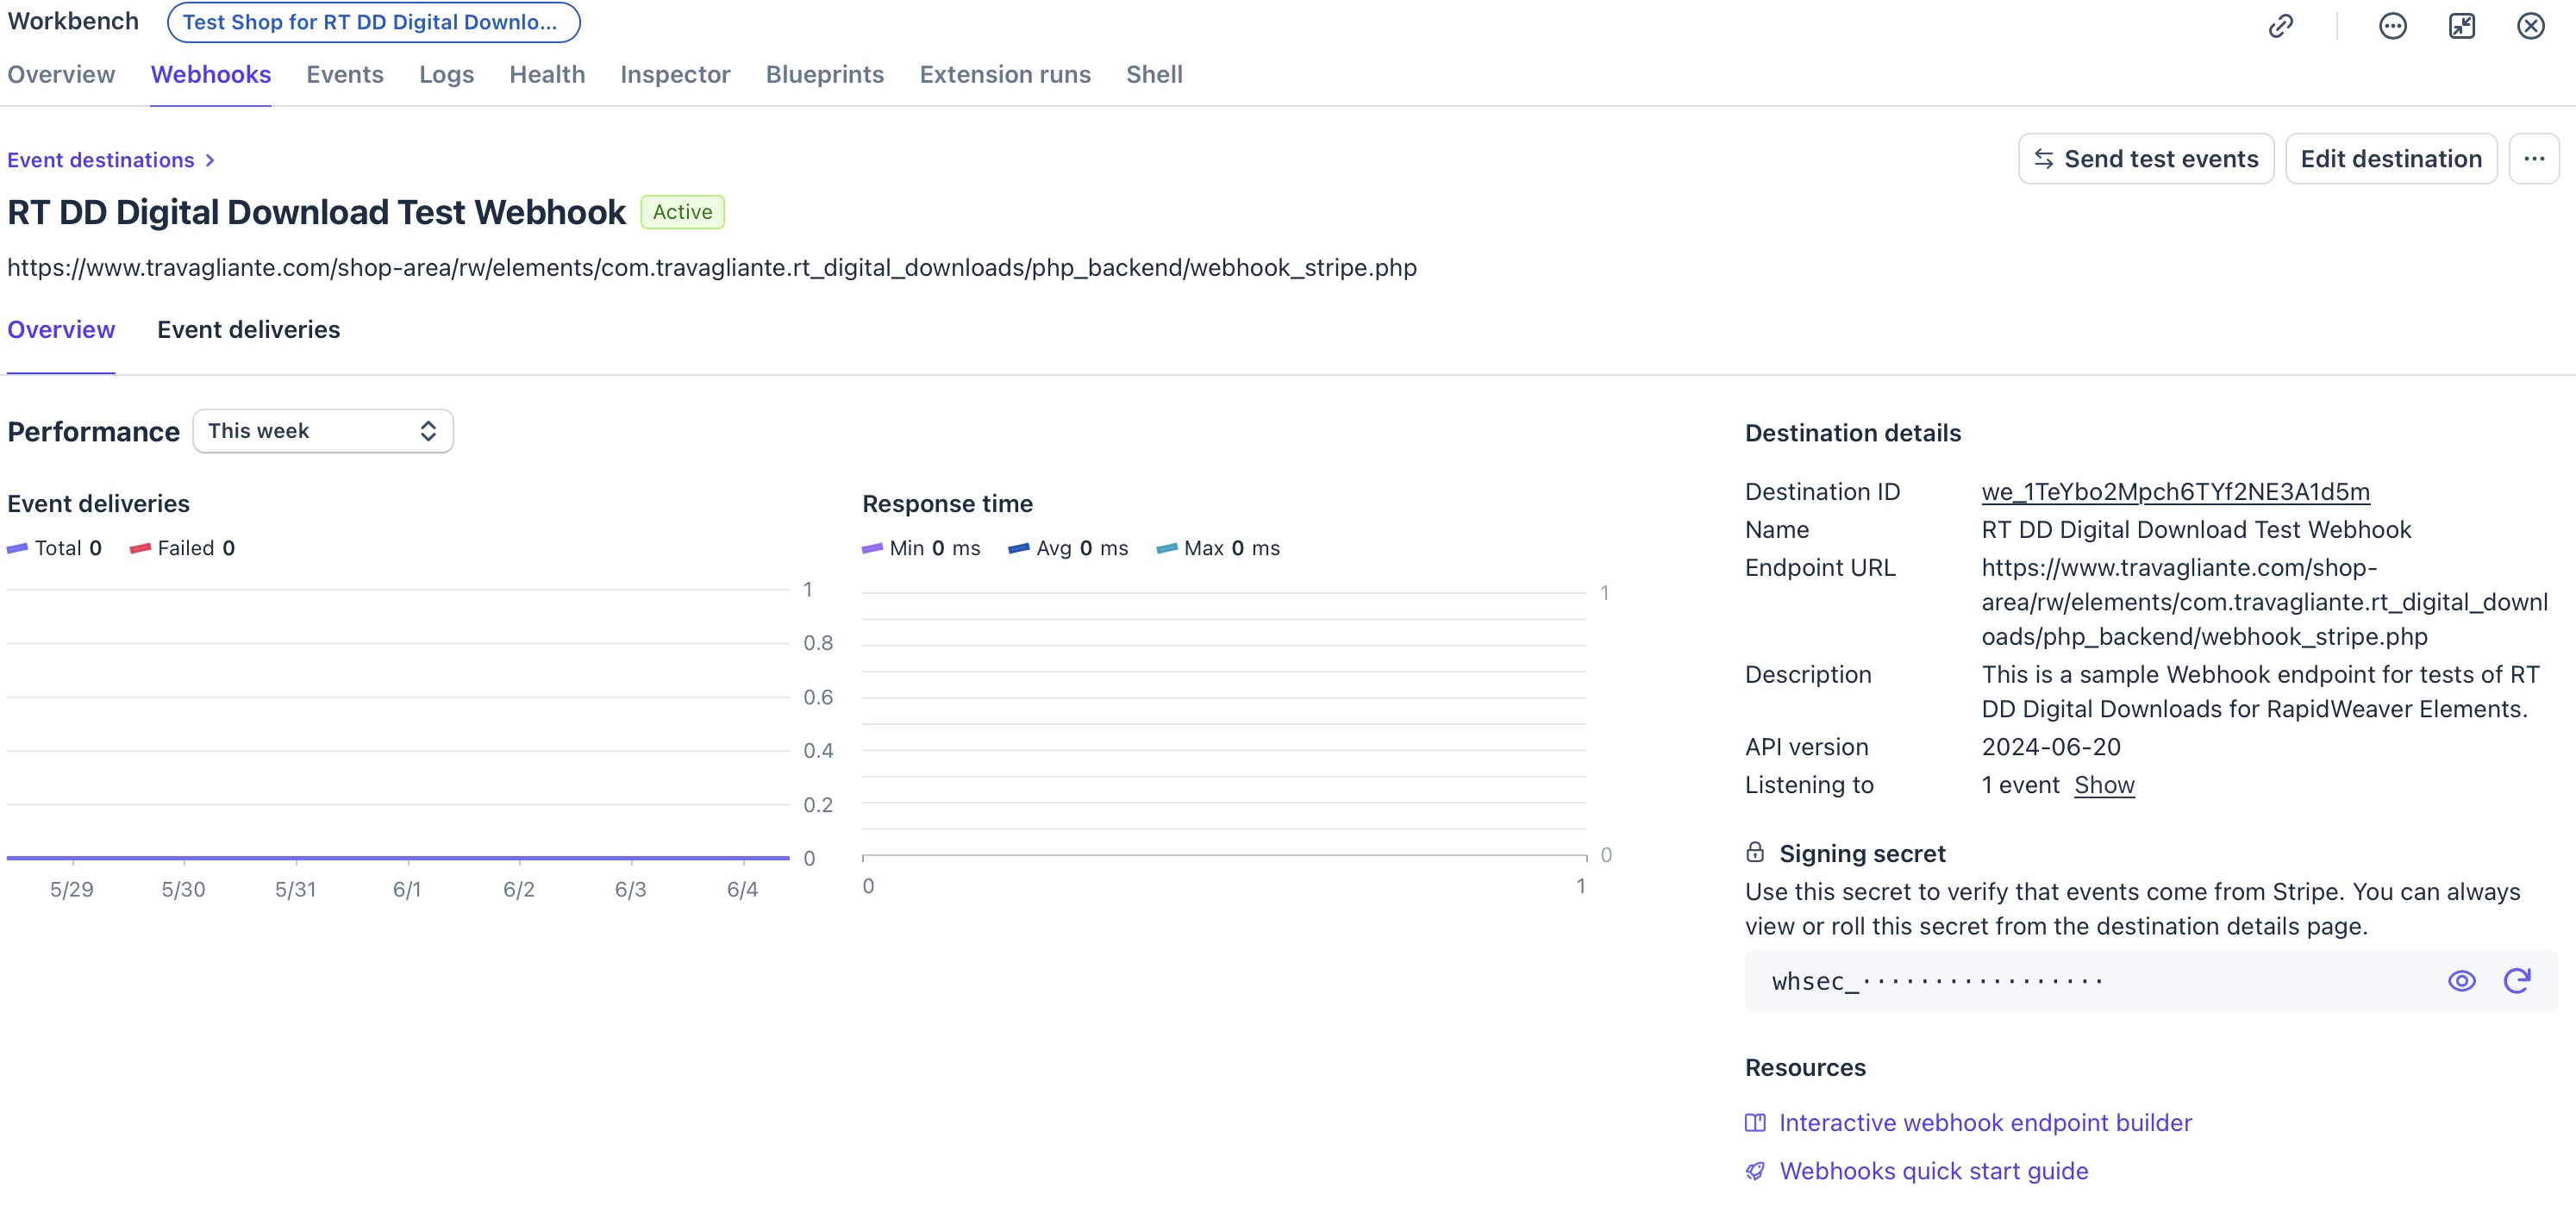
-
Finally, go back to your RapidWeaver Elements Inspector for the Buy Button and paste this key into the Stripe webhook property field.

Some words about the Signing Secret (Anti-Fraud Protection)
Because your webhook endpoint is an open URL on the internet, malicious bots could theoretically try to send fake "payment completed" messages to it, attempting to steal your digital files for free.
To prevent this, Stripe signs every legitimate webhook payload with a cryptographic signature.
When a webhook hits your server, your webhook_stripe.php script will now use this whsec_ key to mathematically verify that the message genuinely came from Stripe and hasn't been tampered with. If the signature doesn't match, the script instantly aborts the process, protecting your store from fraud.
Testing the Integration
Before launching your store, you must verify the integration is working, first in Sandbox.
- Publish your RapidWeaver project to your live server.
- Ensure your Buy Button is set to "Stripe" and you are using your sk_test_ keys.
- Go to your live website and execute a test purchase using one of Stripe's provided test credit cards (e.g., repeating 4242 4242 4242 4242).
- After completing the checkout, log into your RT Digital Downloads Order Dashboard.
- If the configuration is correct, you will immediately see the new order logged in the dashboard, meaning the webhook successfully communicated with your JSON database!
PayPal Setup & Instant Payment Notification (IPN)
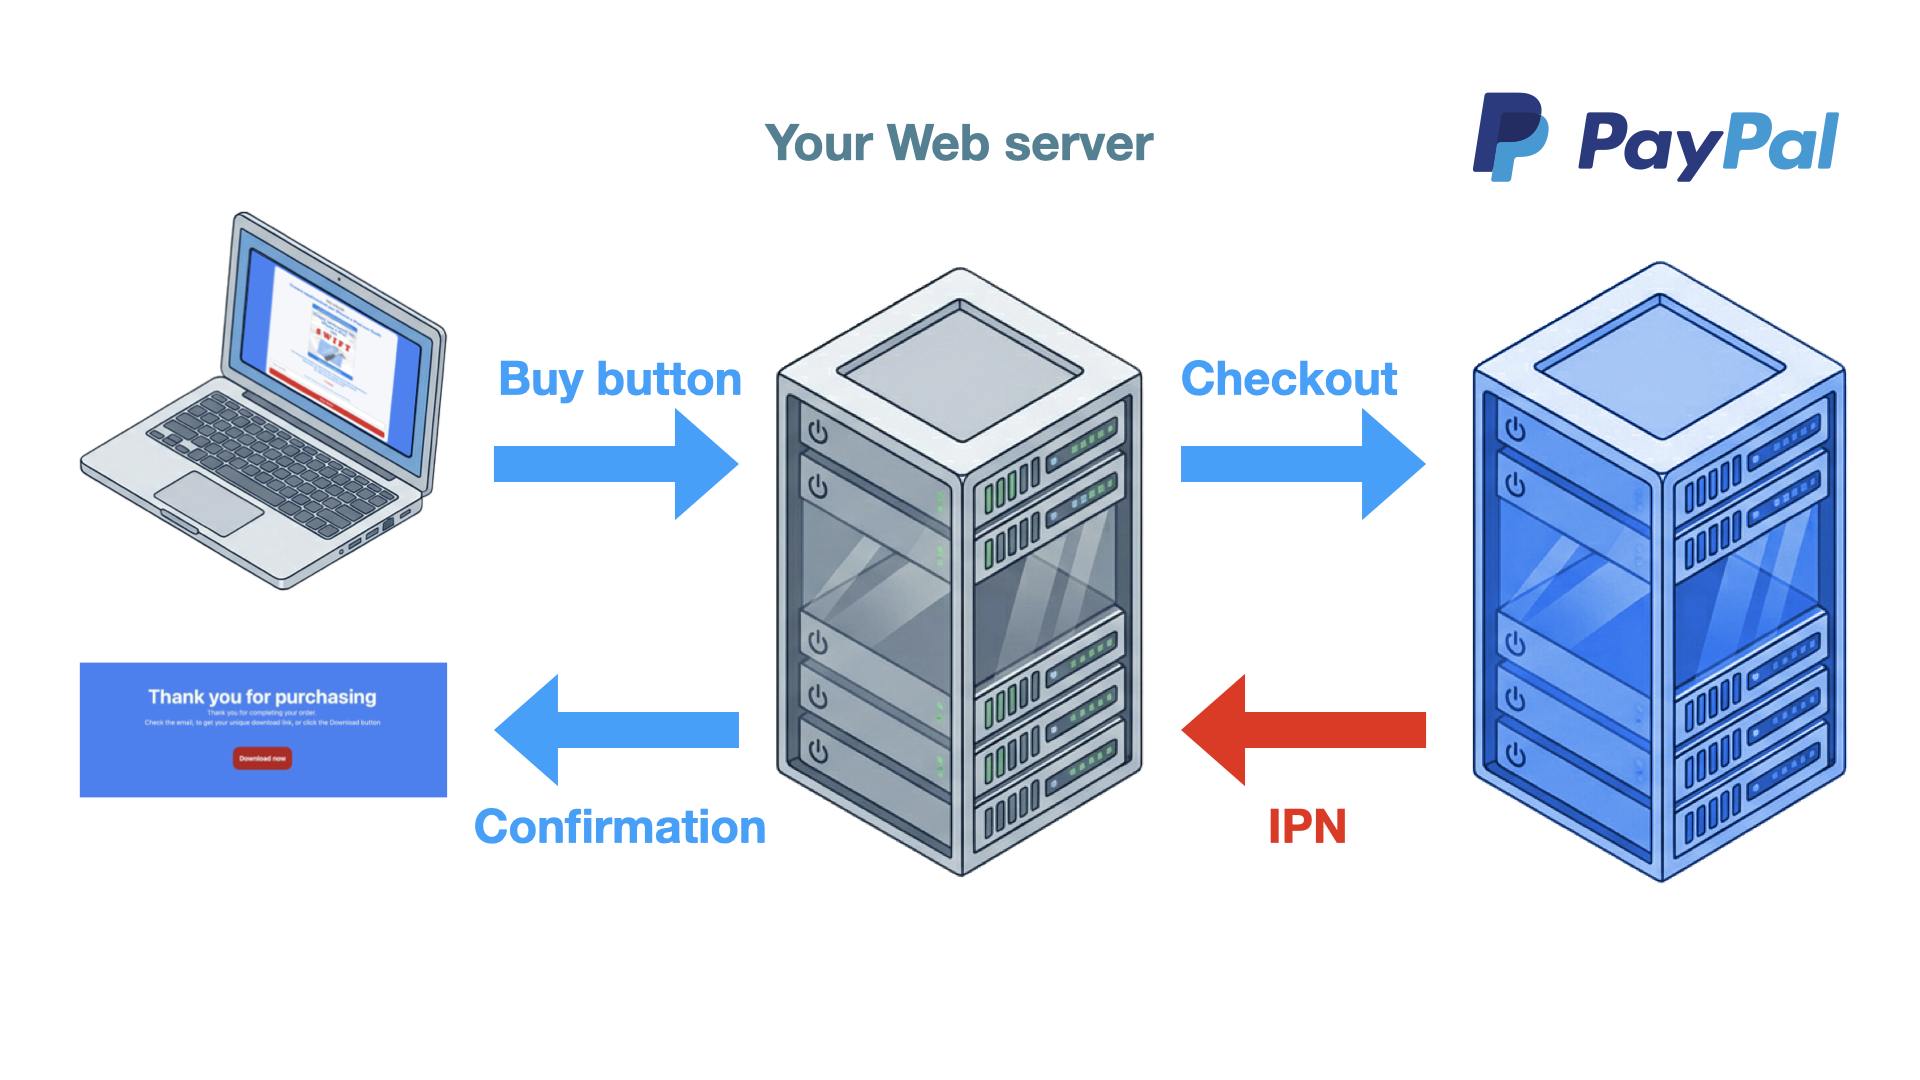
Integrating PayPal ensures you capture customers who prefer a traditional, widely trusted digital wallet over direct credit card entry. To securely bridge PayPal's payment network with your RT Digital Downloads ecosystem, the framework utilizes PayPal’s battle-tested Instant Payment Notification (IPN) pipeline.
Just like Stripe's webhooks, IPN is a background, server-to-server communication protocol. When a customer completes a purchase, PayPal silently sends an encrypted data payload directly to your backend (ipn_paypal.php), ensuring the transaction is recorded securely even if the customer accidentally closes their browser before returning to your Success Page.
The "Man-in-the-Middle" Threat & The Anti-Fraud Pipeline
Historically, basic PayPal HTML buttons were vulnerable to client-side manipulation. A malicious user could right-click your webpage, inspect the code, and change the hidden price value from $50.00 to $0.01 before checking out.
To completely neutralize this threat, the RT Digital Downloads suite operates a sophisticated Four-Stage Anti-Fraud Verification Pipeline. When your server receives an IPN message from PayPal, it doesn't just blindly trust it. It cross-references the data PayPal sends against the internal pending order logged by your RapidWeaver Elements Buy Button.
If any of the following four checks fail, the system instantly aborts the transaction, prevents the download link from generating, and logs the attempt:
- Payment State Audit: The script inspects the payment_status variable. It must exactly match the string Completed. If the status is Pending (e.g., an eCheck that hasn't cleared yet) or Failed, the system halts execution. The file remains locked until the funds officially clear.
- Price Matching Engine: This is your primary shield against price tampering. The script extracts the gross payment amount received by PayPal (mc_gross) and compares it to the baseline price locked inside your internal JSON database. If there is even a one-cent discrepancy, the system blocks the order.
- Currency Validation: Scammers often attempt to exploit exchange rates by forcing the transaction into a much weaker currency. The system validates the mc_currency field against your established product configuration (e.g., ensuring a USD product wasn't paid in JPY).
- Account Ownership Verification: Finally, the script checks the receiver_email field. It ensures that the money was actually deposited into your specific PayPal business account, preventing hackers from routing the payment to their own PayPal addresses while tricking your server into releasing the file.
Phase 1: Prepare your Paypal business account (Sandbox / Live Mode)
Before touching your RT DD Buy Button component, you must configure your PayPal business account. It will receive the payments sent by your customers to you. You can choose to use a Sandbox business account (for testing, before production, with fake transactions), or your real business account (to really start your business and receive true money).
Business account is necessary to utilize the Instant Payment Notification (IPN) system and securely process commercial transactions through the RT Digital Downloads suite, so you must have a verified PayPal Business account. Standard personal accounts do not offer the advanced merchant tools, IPN routing, or API access required for automated digital fulfillment. If you do not already have one, setting it up is a straightforward process.
Real Business account
If you want to set up a sandboxed business account before, jump to the next section (Sandbox Business account).
To set up a real business account (if you haven't already), you can start creating a new account, or you can use your account and configure it for business.
-
Begin by using the following direct link
https://www.paypal.com/bizsignup/, or navigating to the official PayPal website (paypal.com) and clicking the Sign Up button, typically located in the top right corner of the screen. You will be prompted to choose between a "Personal" and a "Business" account. Select Business Account and click "Next." This ensures your account is provisioned from the start with merchant capabilities, allowing you to accept secure credit card payments and hide your personal name behind your brand's business name.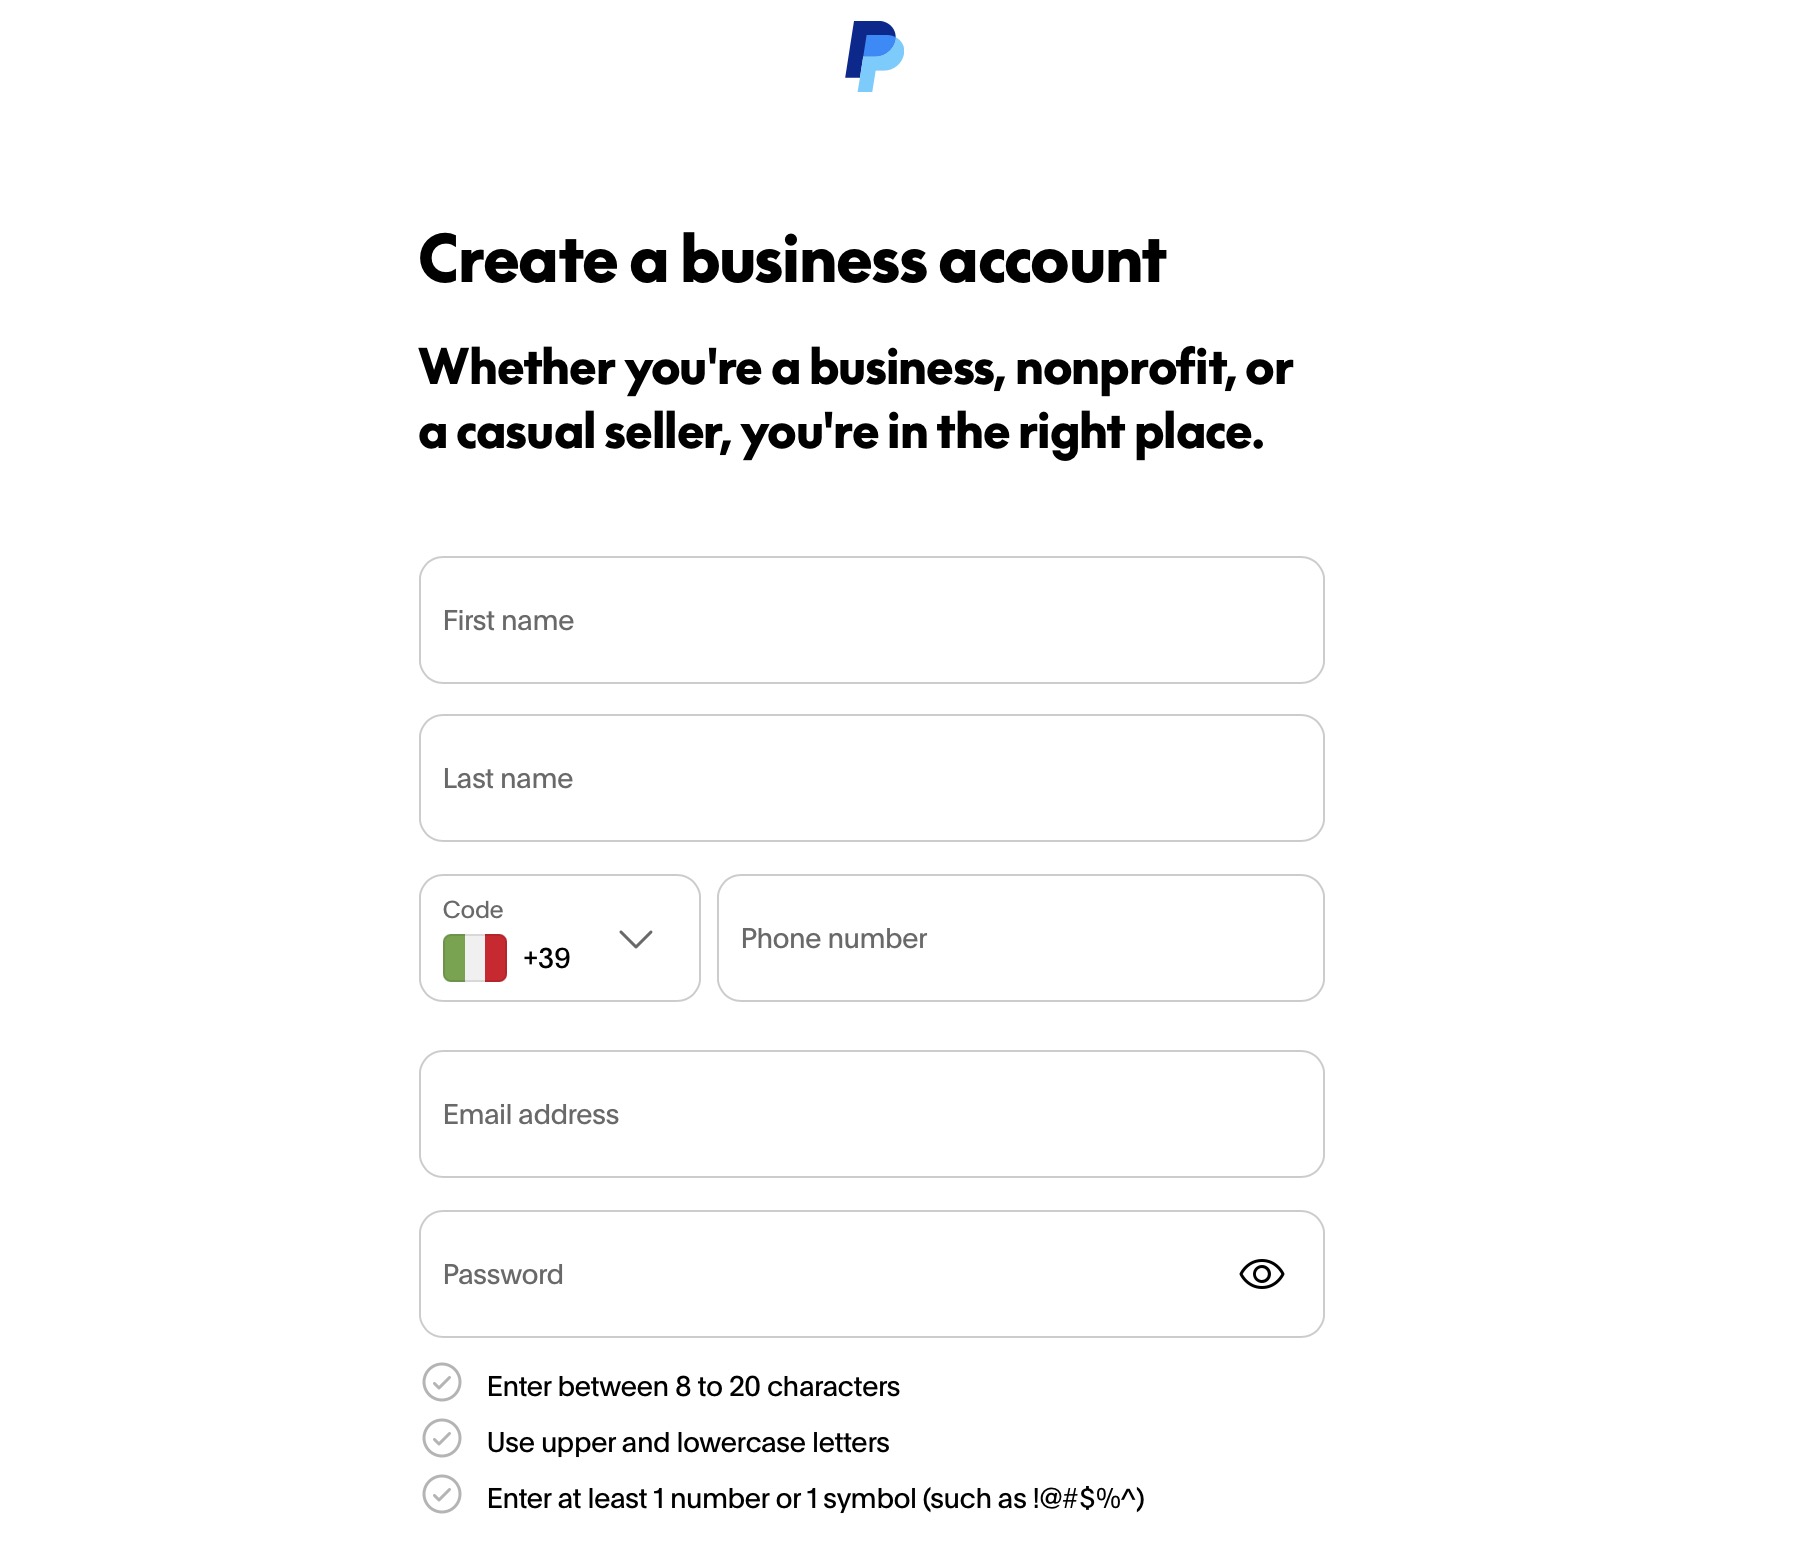
-
Enter all the requested information about your business. You will be asked to enter an email address and create a secure password.
Crucial Note: The email address you register here will become your primary merchant identifier. It is absolutely vital that this exact email address is the one you type into the Paypal email property field within the RapidWeaver Elements Buy Button Inspector. If these two emails do not match perfectly, the anti-fraud pipeline will block all your incoming orders. -
Next, PayPal will guide you through a series of forms to comply with standard financial KYC (Know Your Customer) regulations. You will need to provide your legal business name (or your own name if you are operating as a sole proprietor), your business address, and a customer service phone number. Following this, you must categorize your business type (e.g., Sole Proprietorship, LLC, Corporation) and provide a brief description of the digital goods you are selling. You will also be required to enter personal verification details, such as your Date of Birth and a Social Security Number (SSN) or Employer Identification Number (EIN), depending on your local tax jurisdiction.
-
Once the initial setup is complete, PayPal will send a confirmation link to the email address you provided. You must log into your email inbox and click this link to verify your identity and activate the account. Finally, to ensure you can actually withdraw the revenue you generate from your digital downloads, navigate to your PayPal wallet and click Link a bank account. Follow the prompts to connect your local business or personal bank account.
Once your bank is linked and your email is verified, your PayPal Business account is fully operational and ready to be integrated with your RT Digital Downloads IPN endpoint! So, you can jump to IPN setup (Phase 3).
Sandbox Business account
To set up a Sandbox business account, and do all your tests without wasting money, then follow the following steps:
-
Open the PayPal Dashboard (it is usually reachable at the following address:
https://developer.paypal.com/dashboard/). Choose if you want to configure PayPal in Sandbox o Live mode (Please, first check the correct functionality using Sandbox, then change to "Live")
-
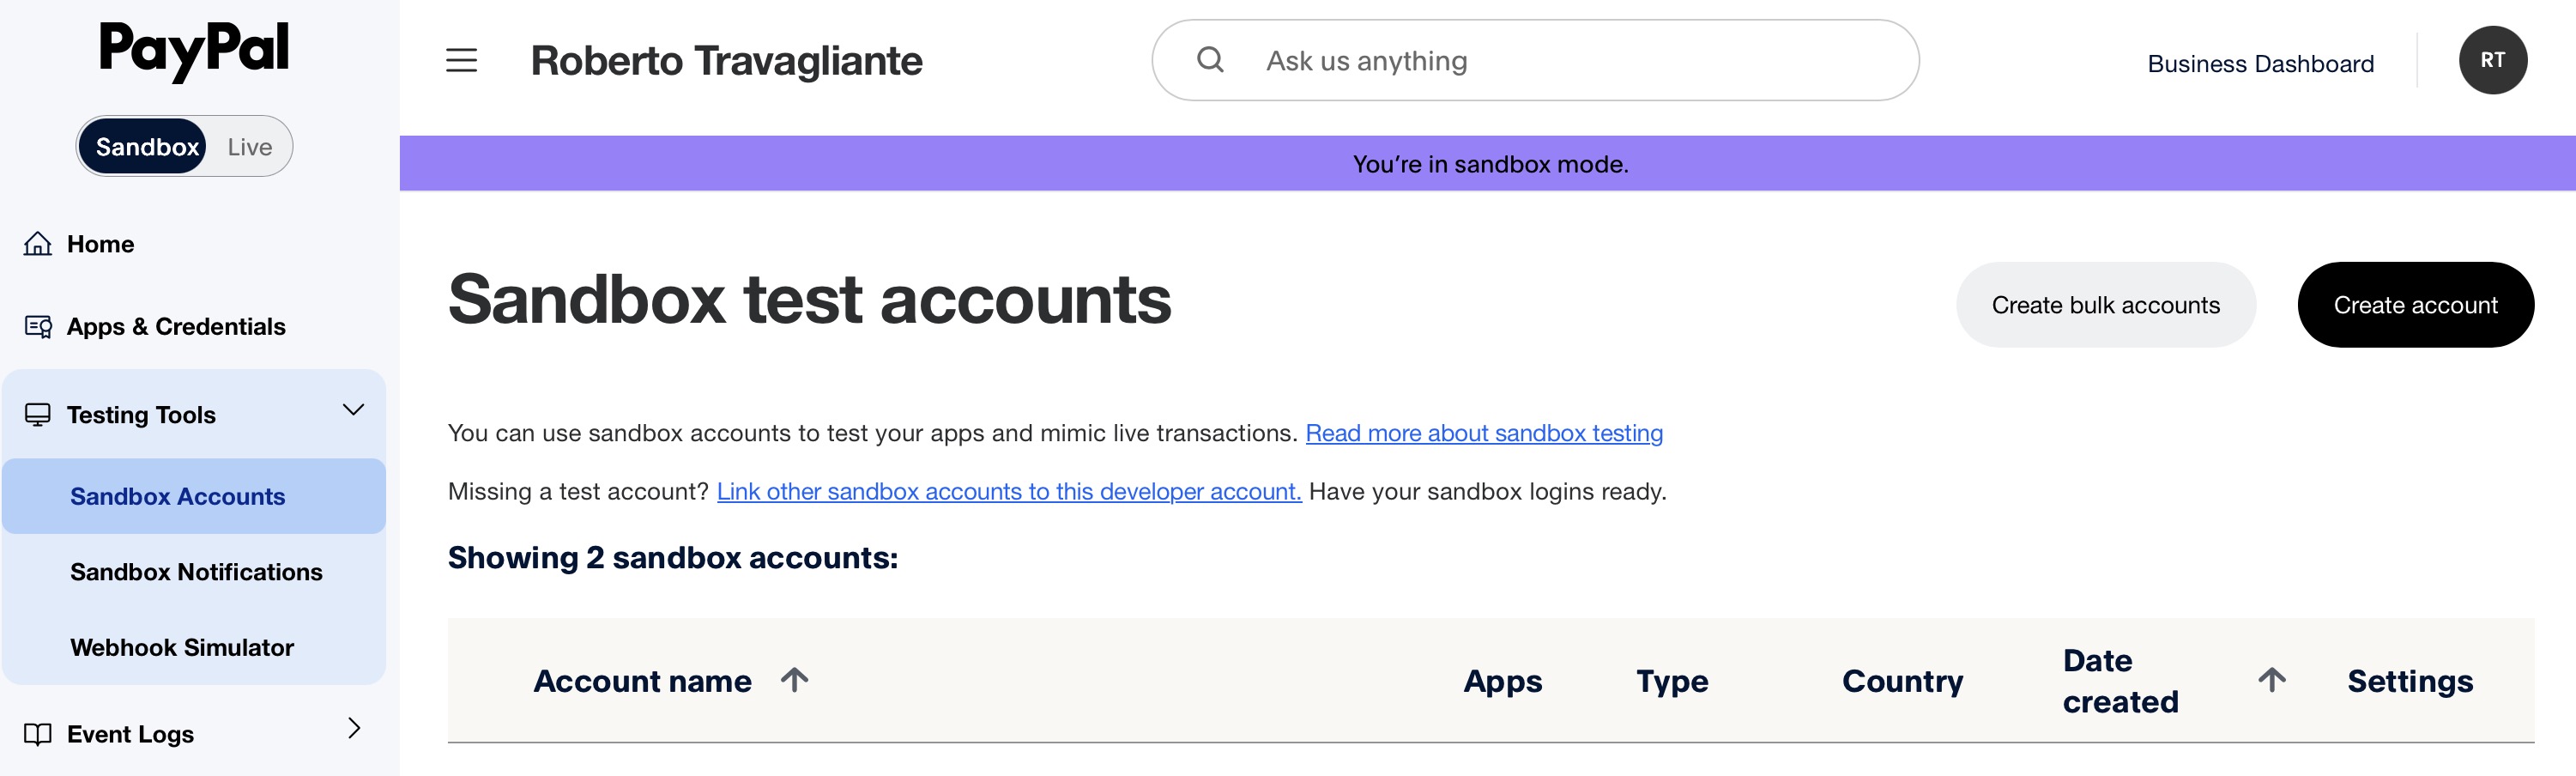
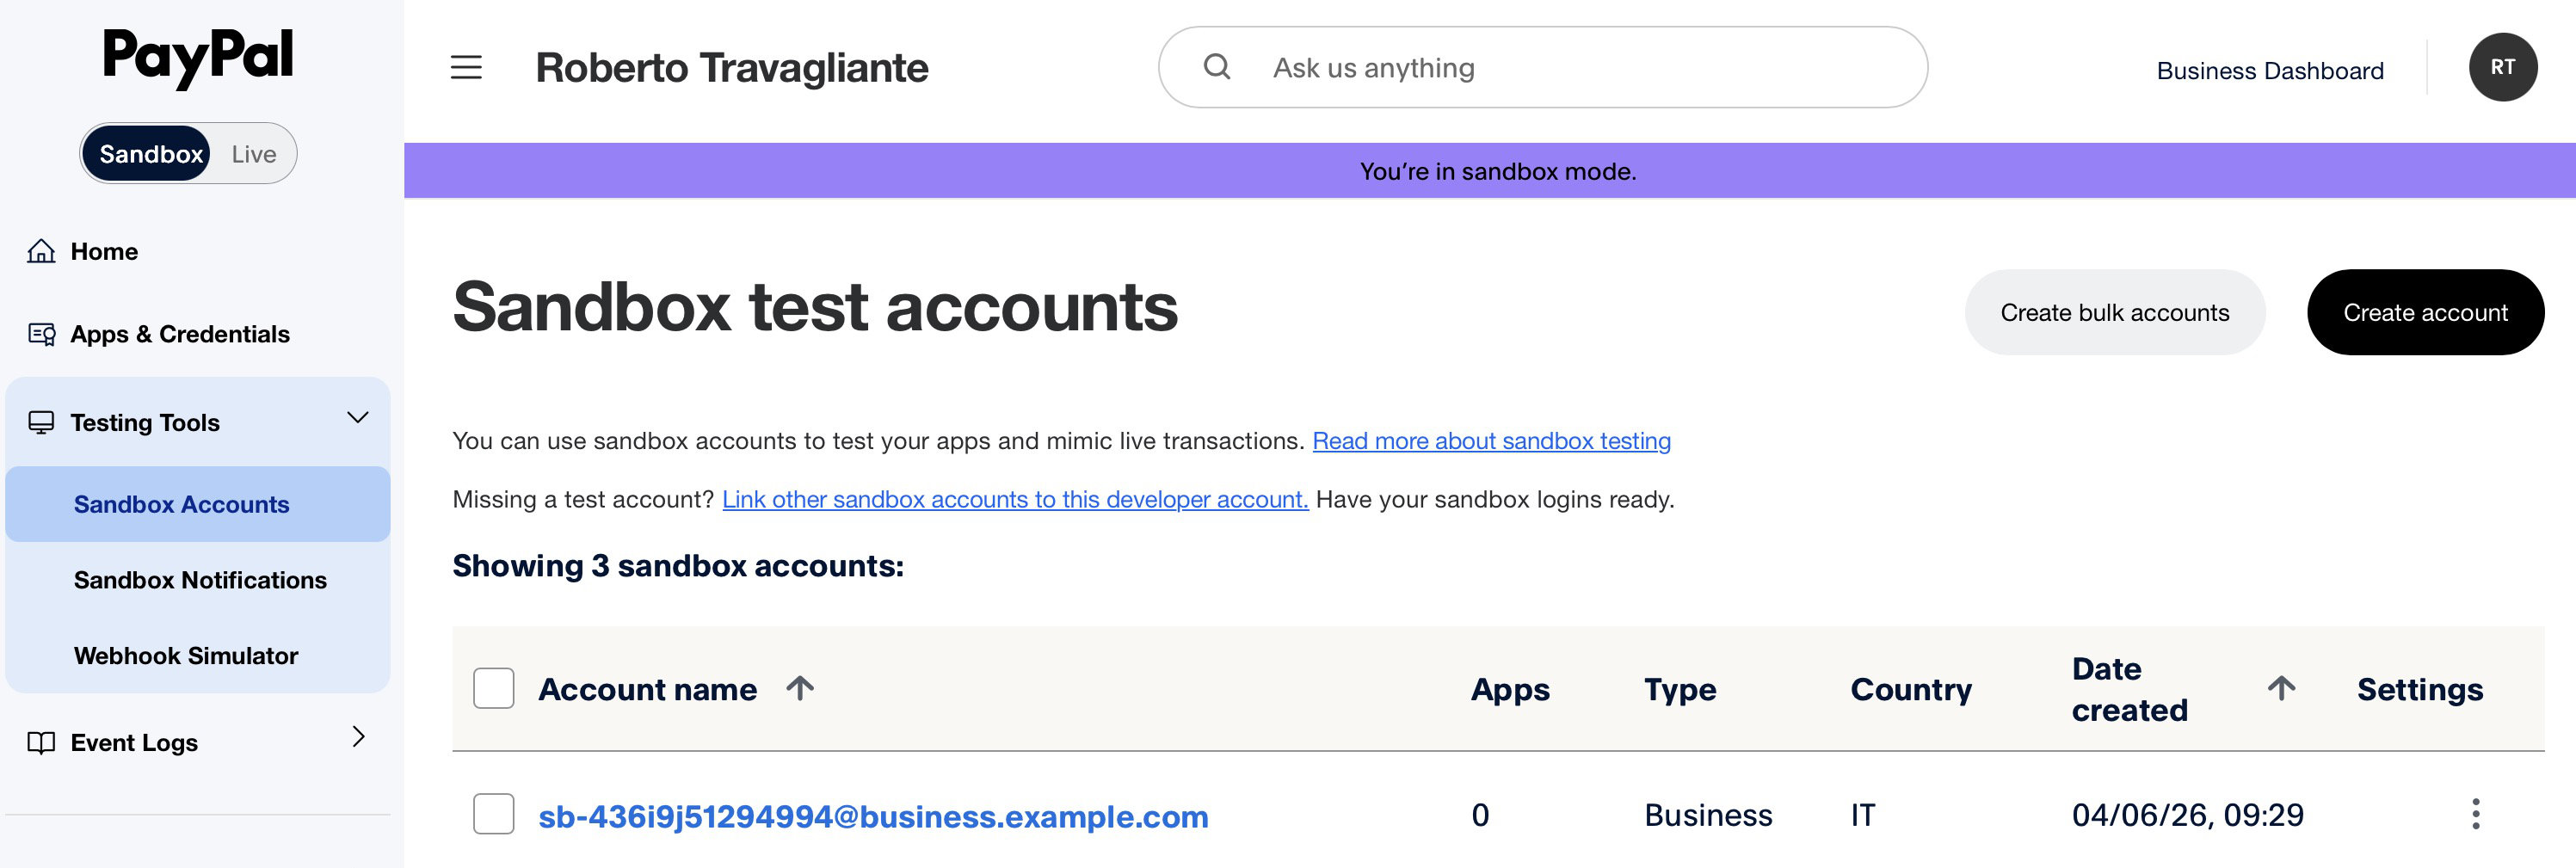
Click on menu item "Testing Tools" and "Sandbox Accounts", and in the next page click the "Create account" button.
-
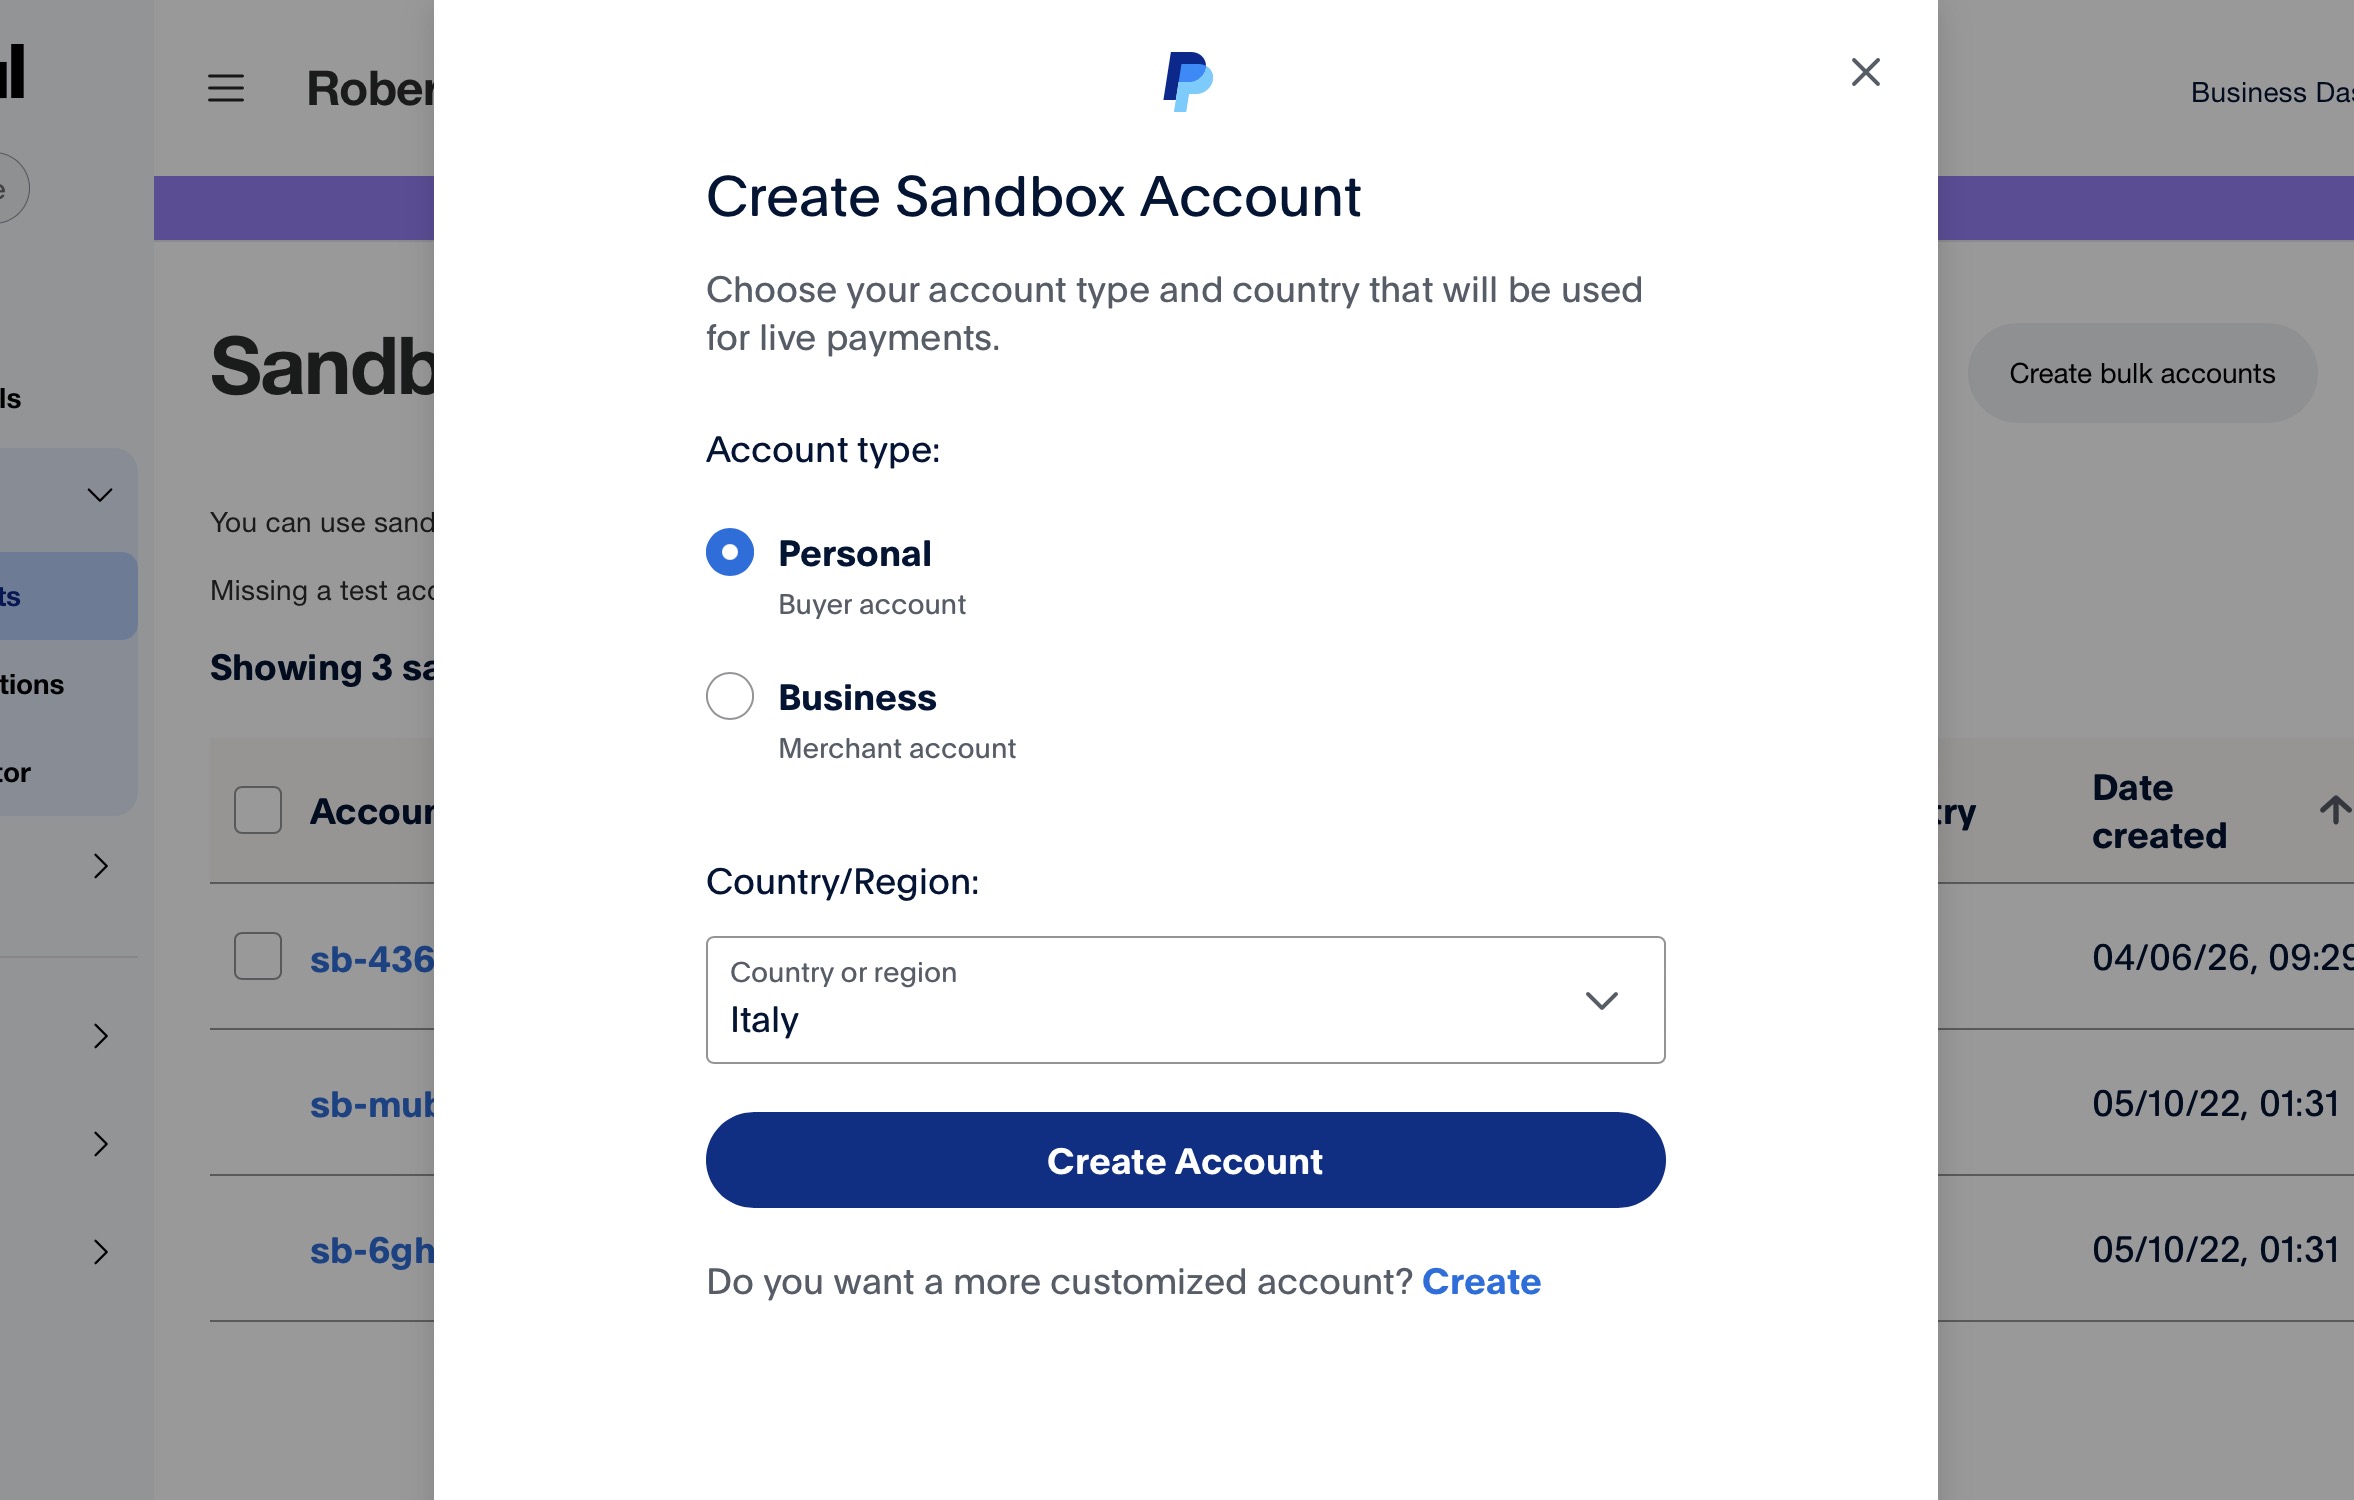
Select Business account (Merchant) as account type and choose the country that will be used for live payments.

-
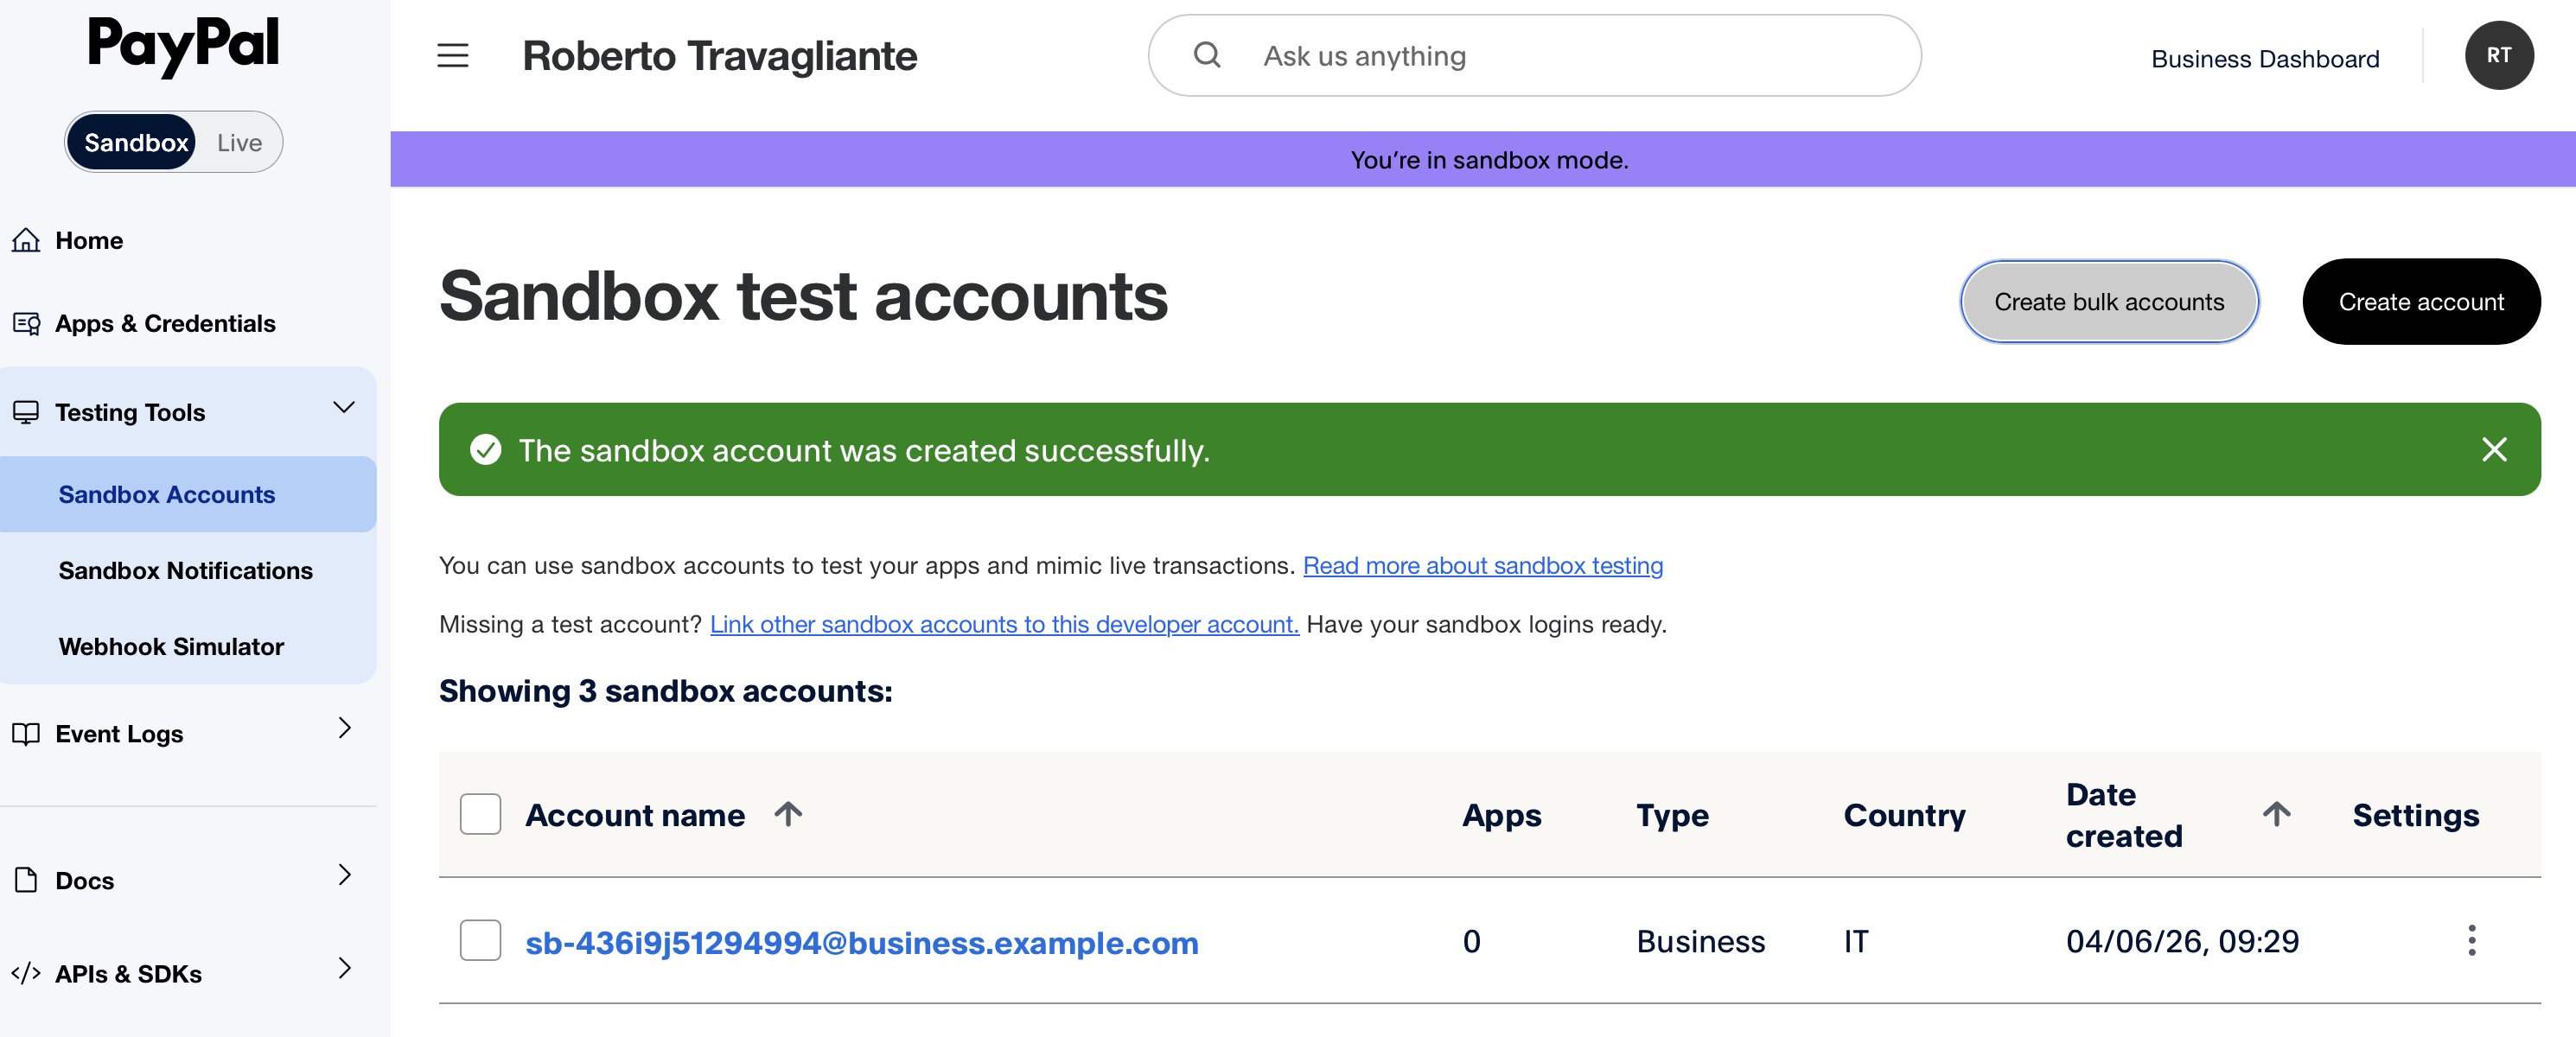
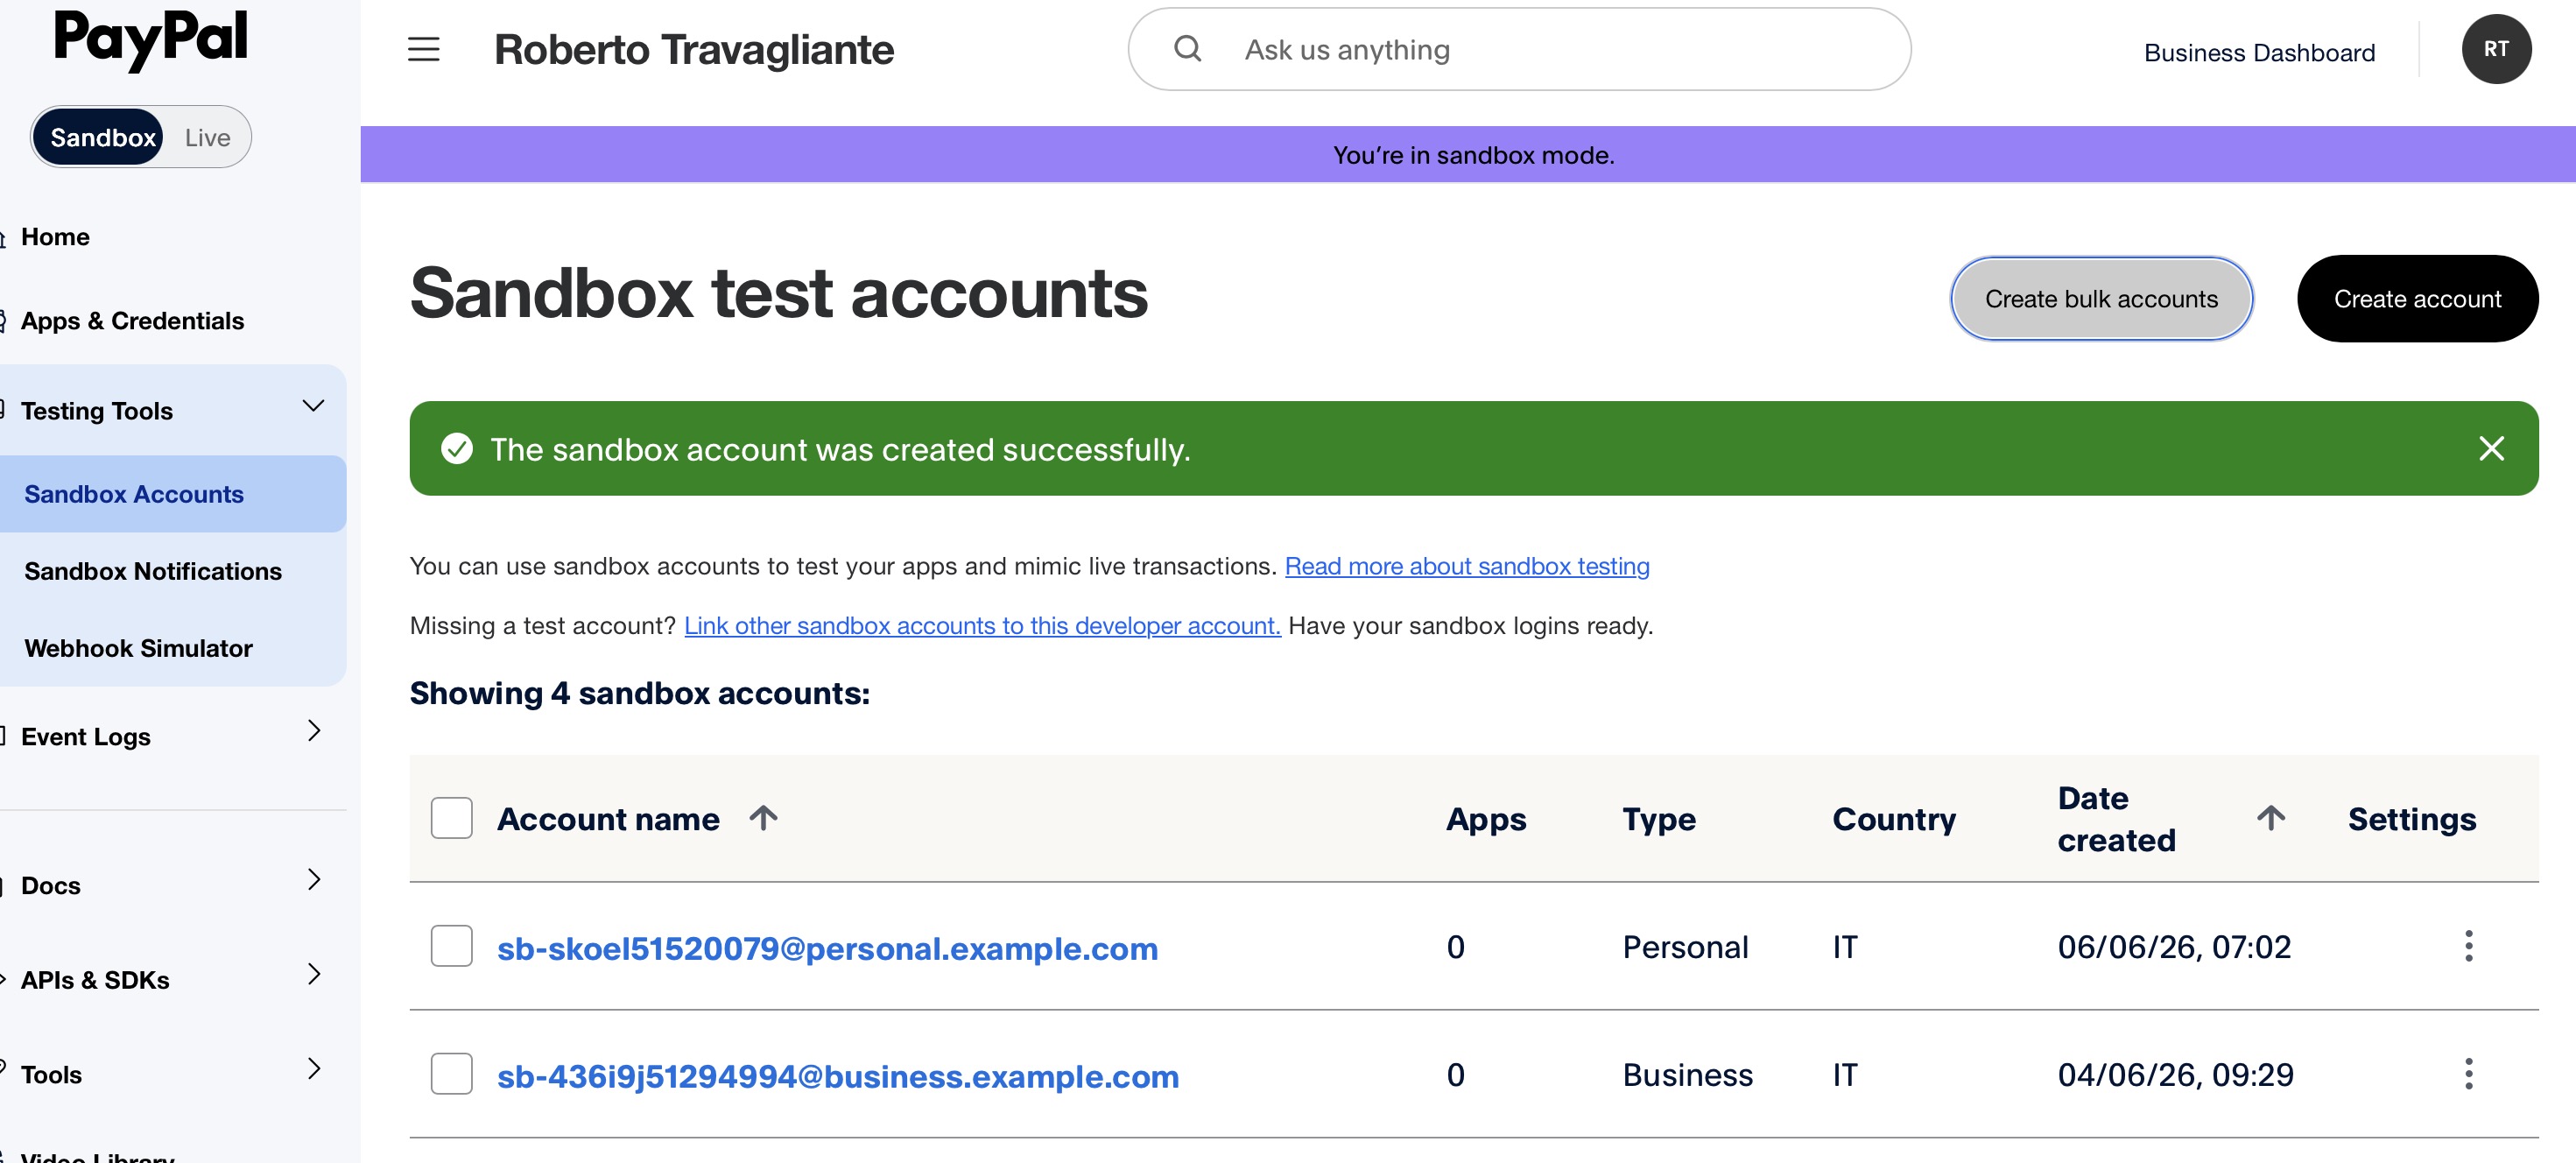
Take note of your new Business account.
-
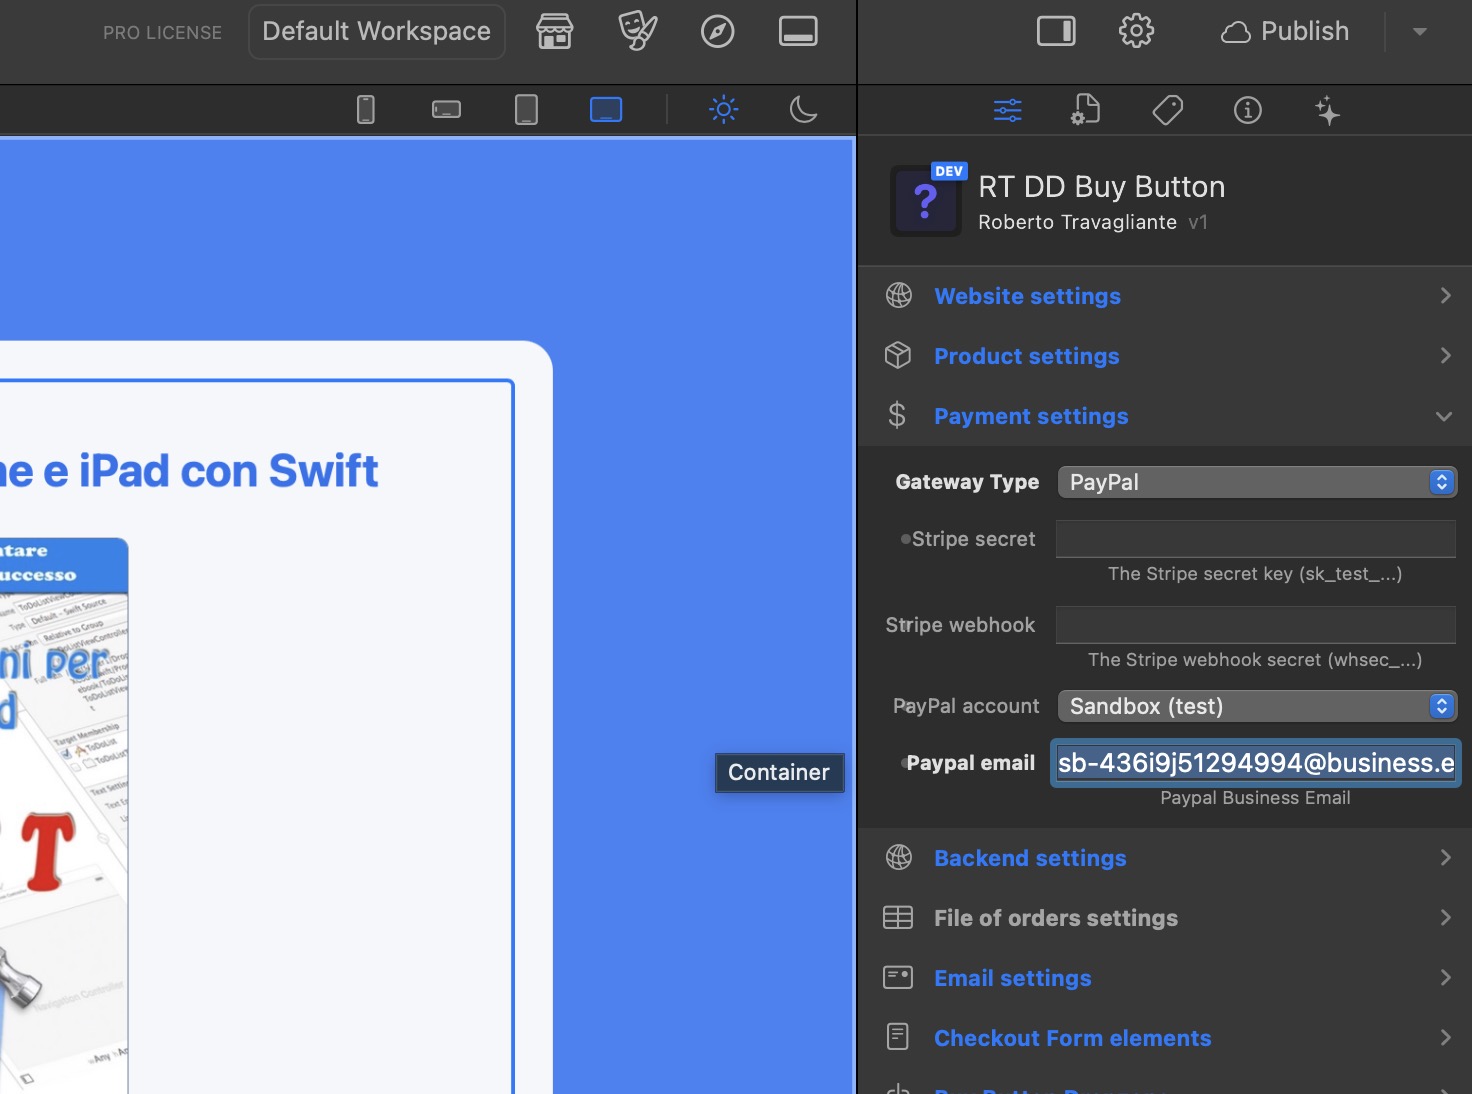
Finally, go back to your RapidWeaver Elements Inspector for the Buy Button. Set the Gateway Type to PayPal, choose either Sandbox (for testing) or Live (for production), and paste this email into the PayPal email property field.
Phase 2: Prepare your Paypal buyer account (only Sandbox)
If you choosed to create a Sandbox business account and you want to safely test your website with PayPal, doing fake transactions without wasting money, then you must configure also a PayPal personal account for sandbox. This will be the fake account of imaginary customer that buy your digital product.
-
The same way you did before (during creation of your sandbox business account), return to the PayPal screen where are listed the Sandbox test accounts and create a new account. Click the "Create account" button.
-
This time, select Personal account as account type and choose the country that will be used for live payments.
-
Take note of your new Business account.
-
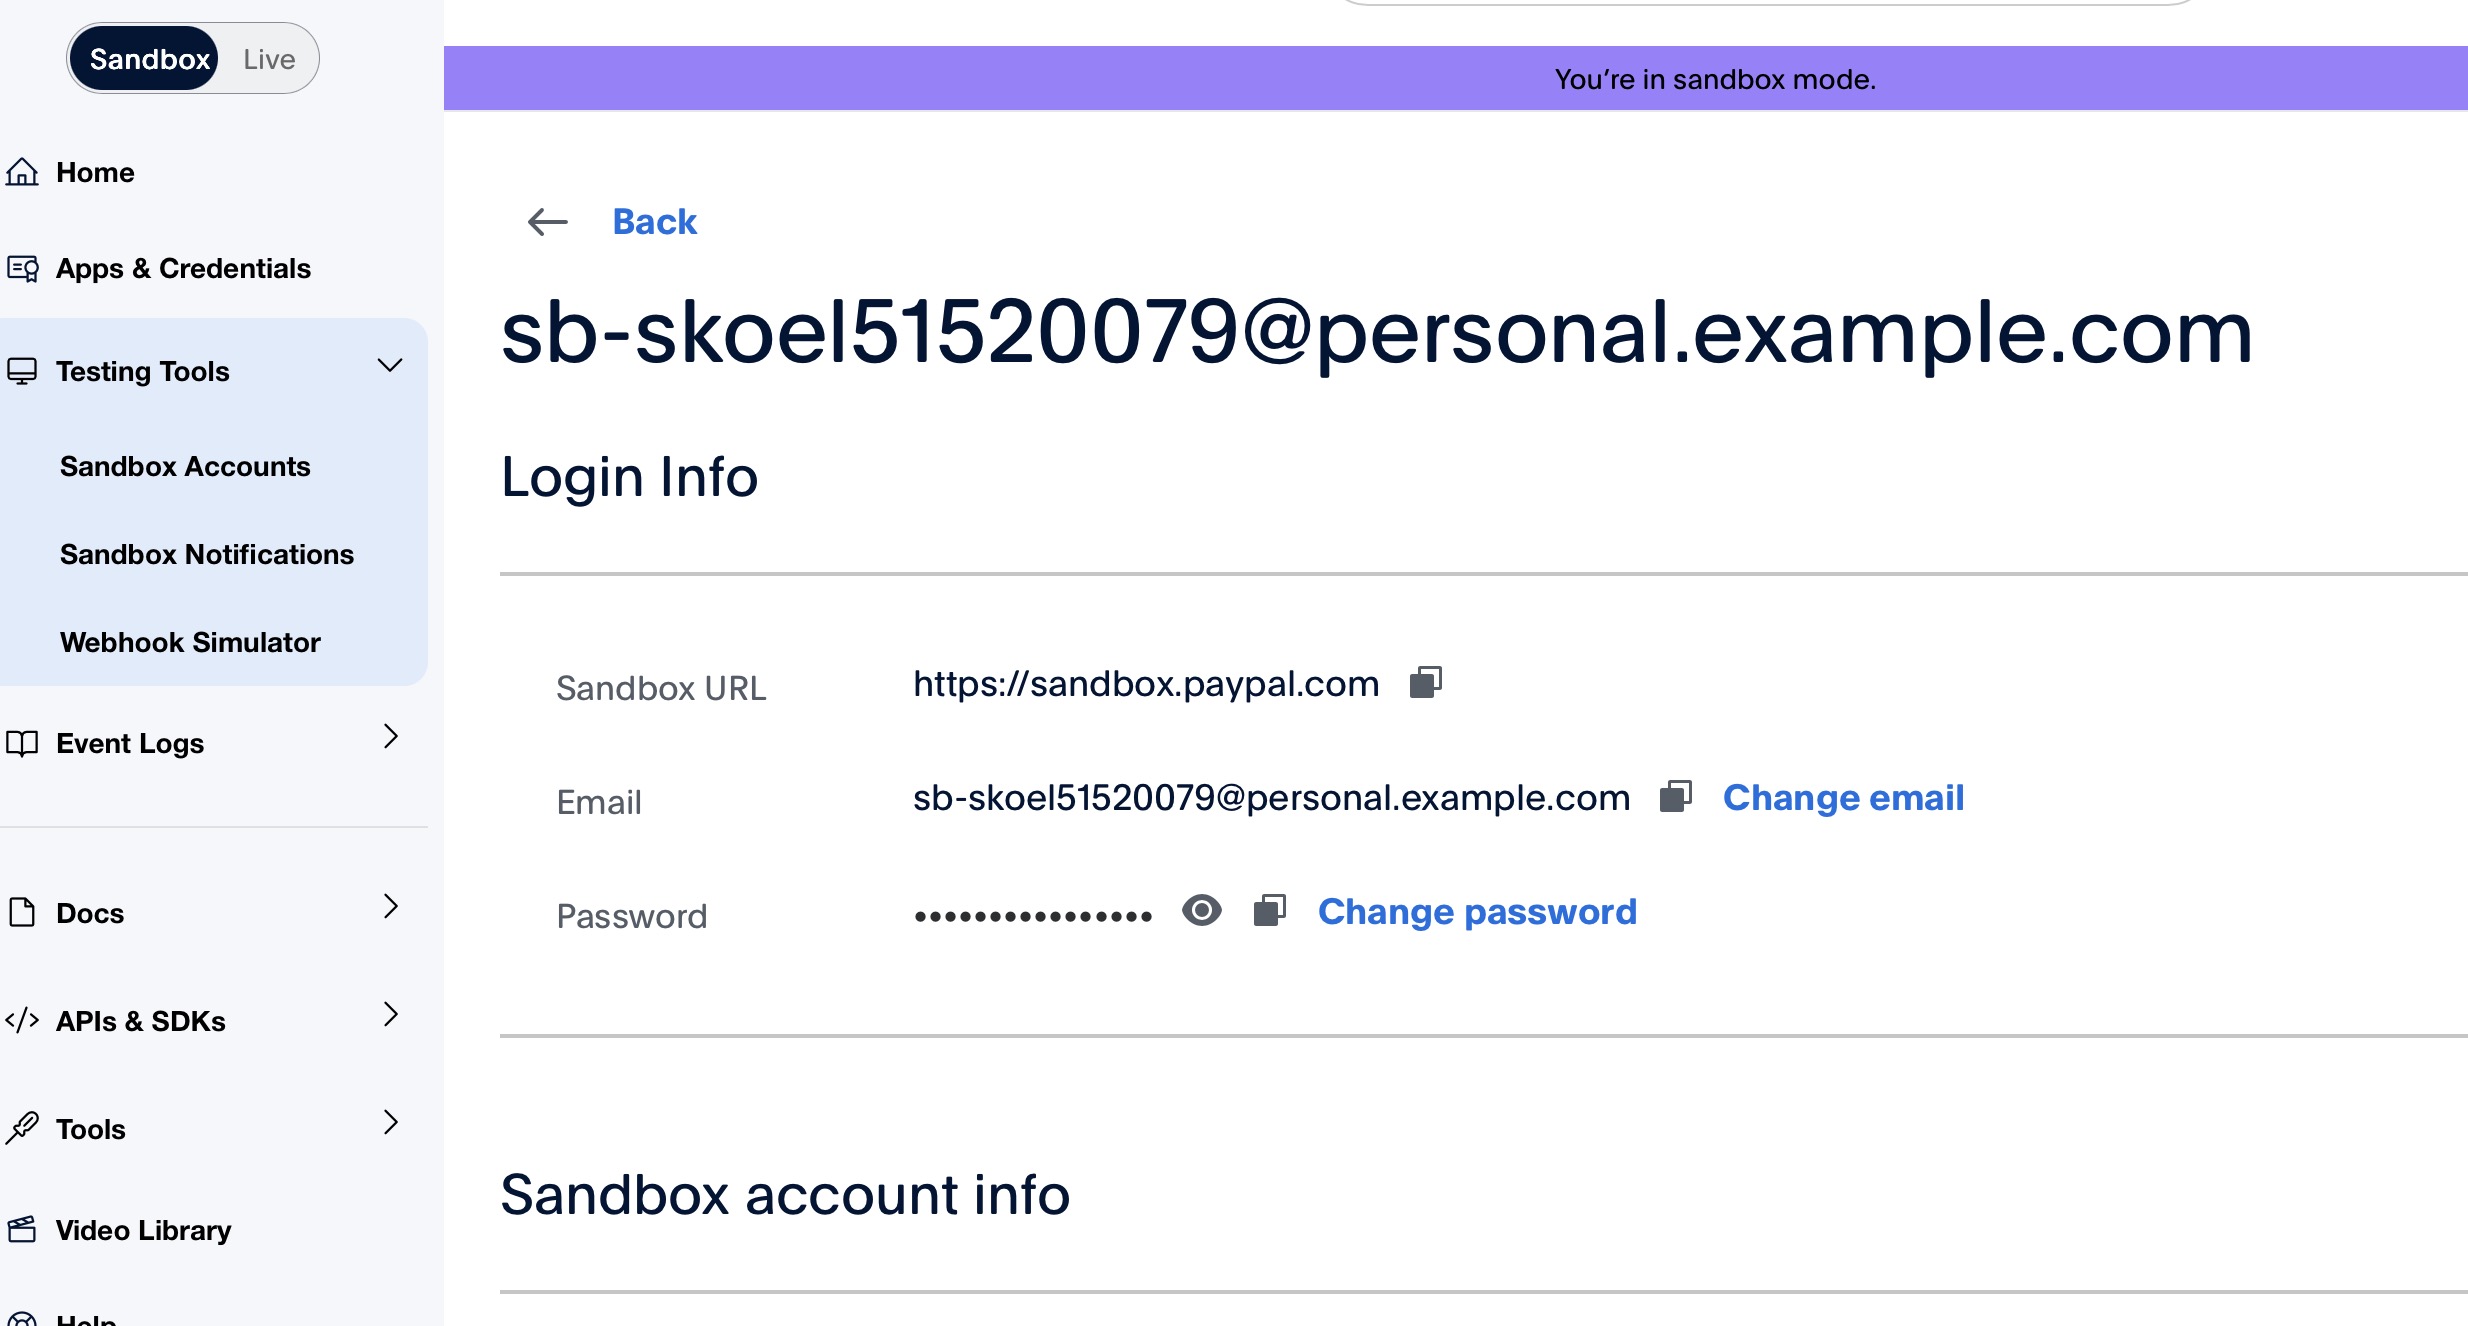
Click also the email address to go to details and take note of the password. You can use that to test purchases.
Phase 3: Activating the IPN Listener Endpoint
At this point, you must tell PayPal where to send its hidden notifications on your server (IPNs).
-
Log into your PayPal Merchant Portal (Business Account). If you want to test with the Sandbox business account, then use the following address:
https://www.sandbox.paypal.com/. Else, if you are using a real business account, use the standard addresshttps://www.paypal.com.
-
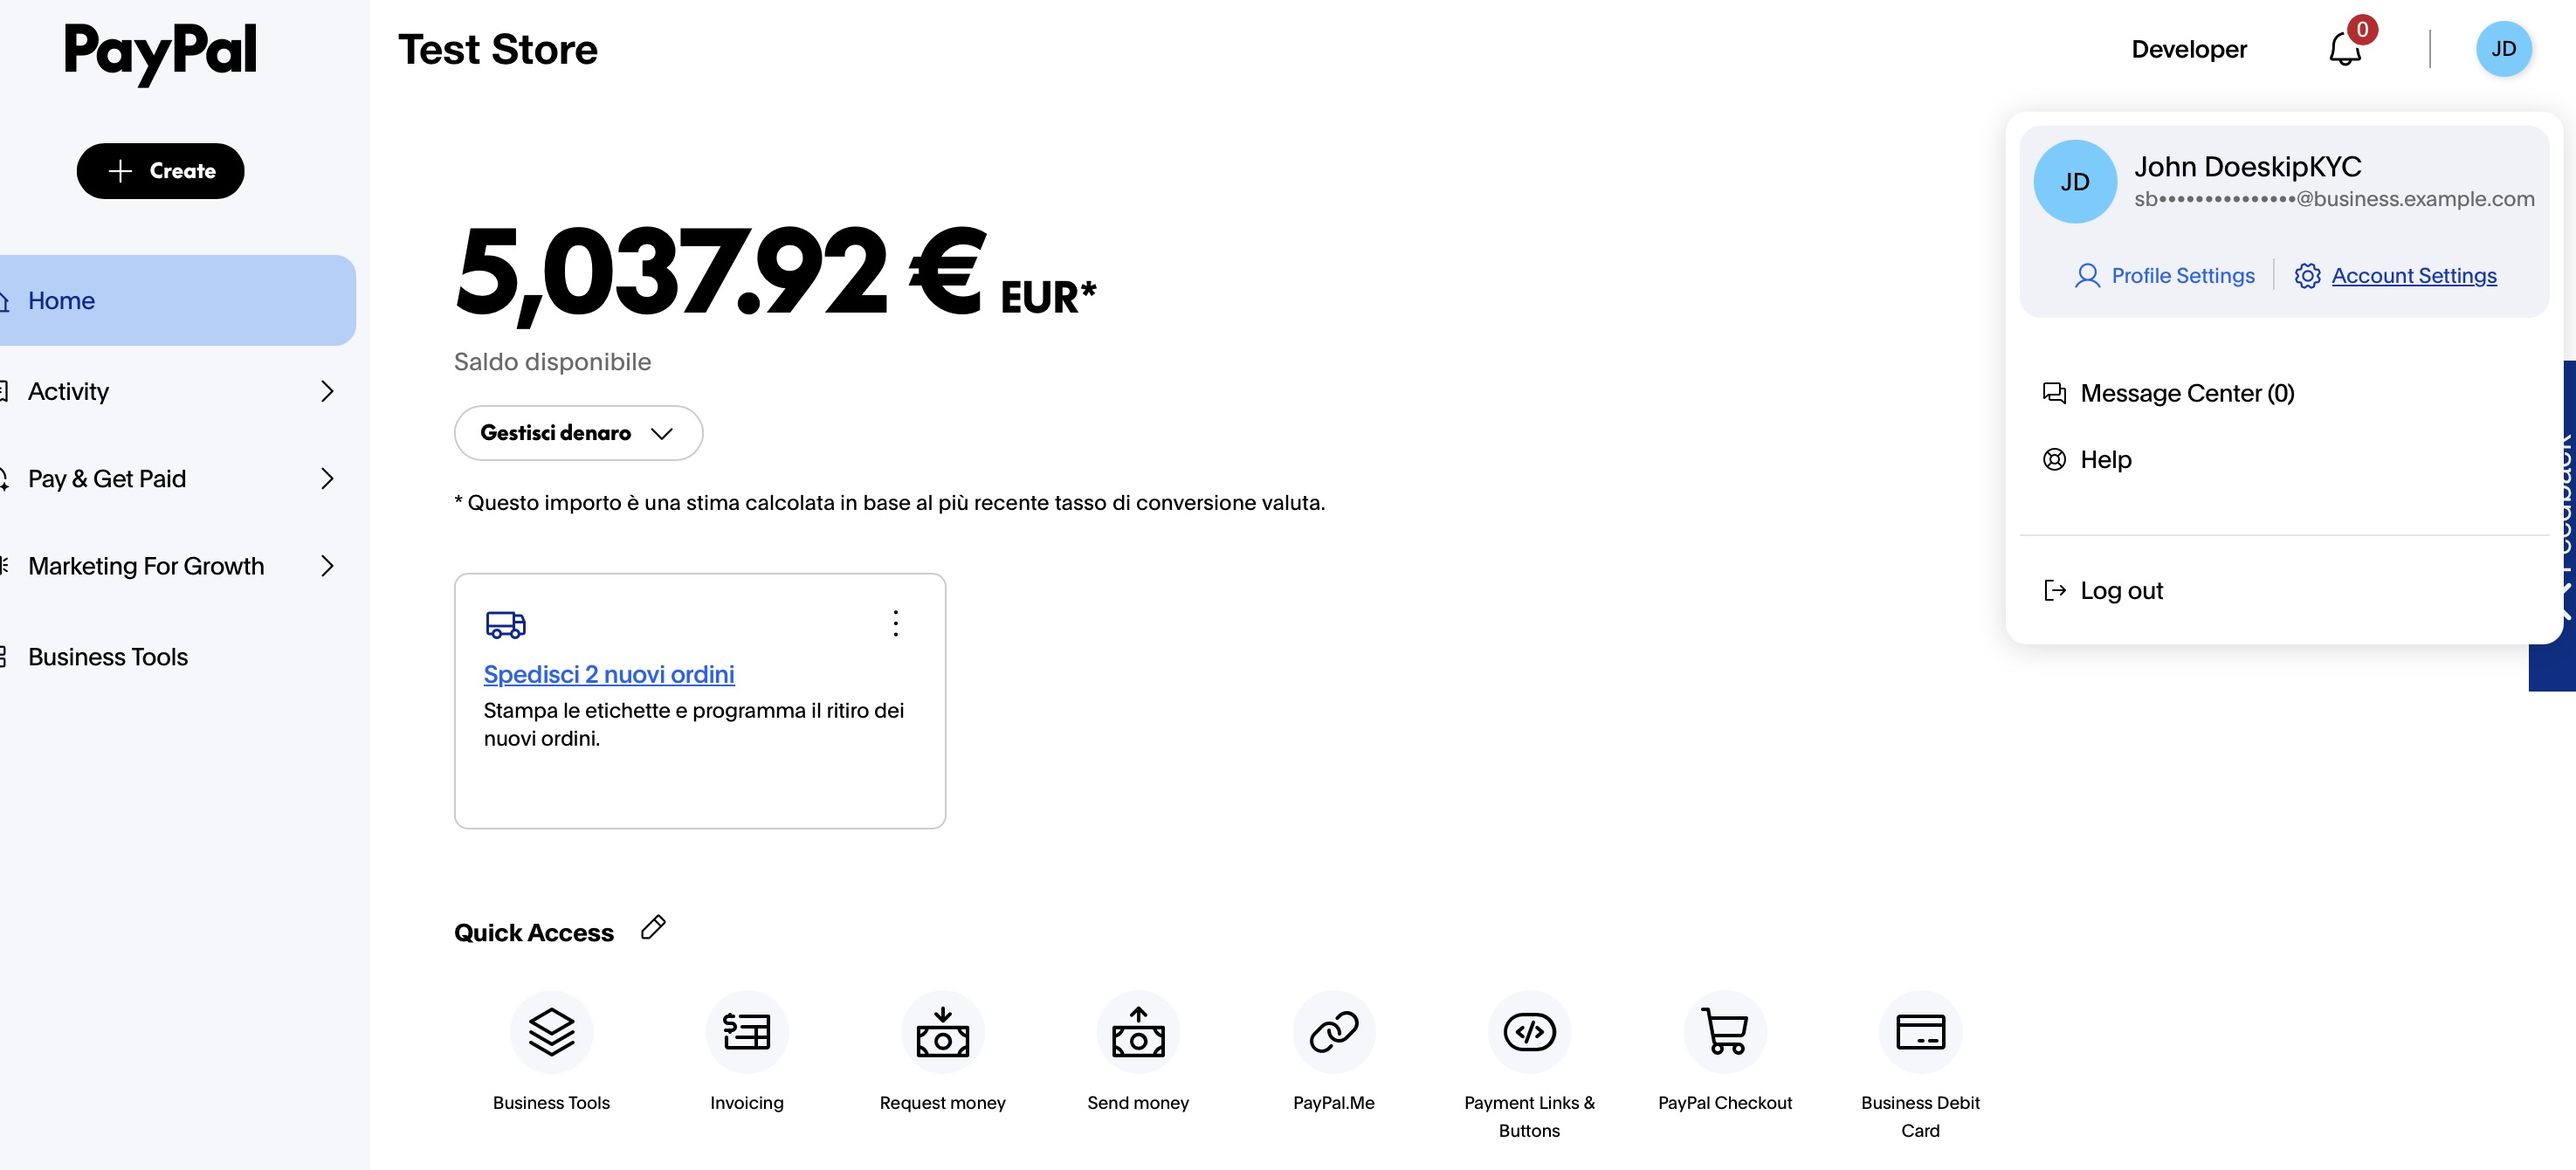
Click on the profile icon in the top right corner and select the "Account settings".
-
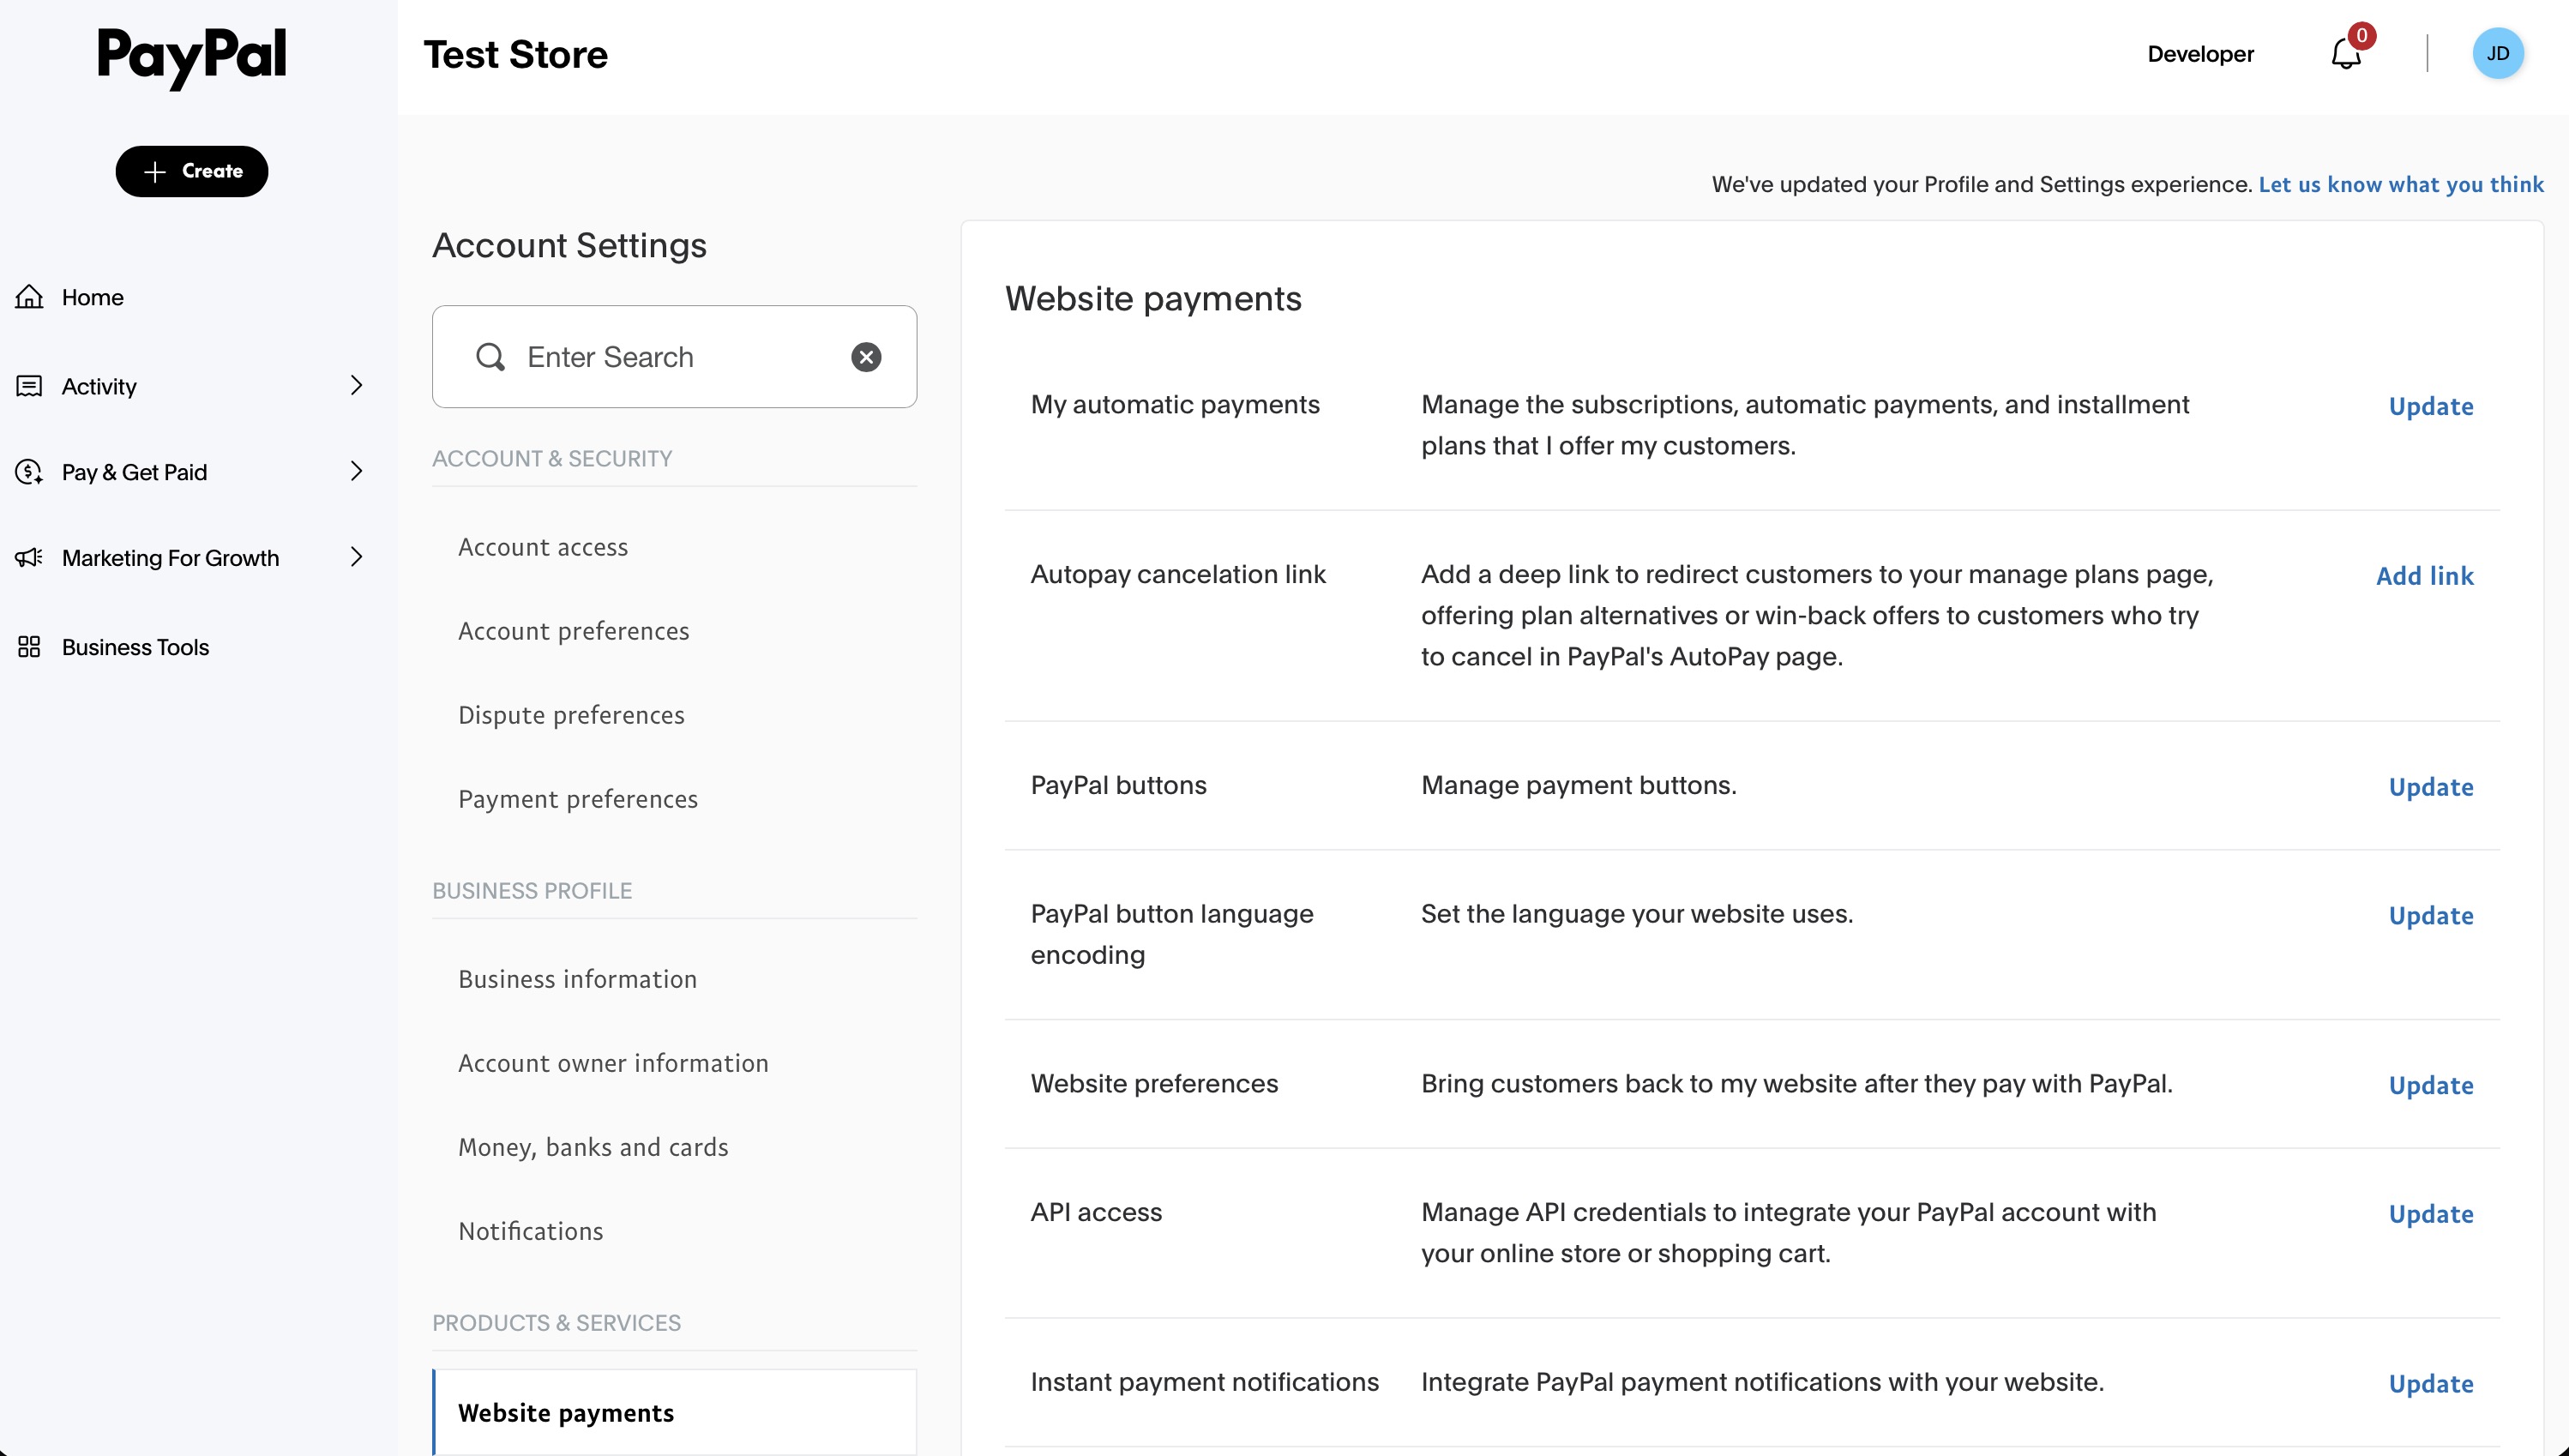
Navigate to "Website payments" and click the "Update" link, near the item titled "Instant payment notifications".
-
Navigate to "Website payments", look for "Instant Payment Notification" and click "Update".
-
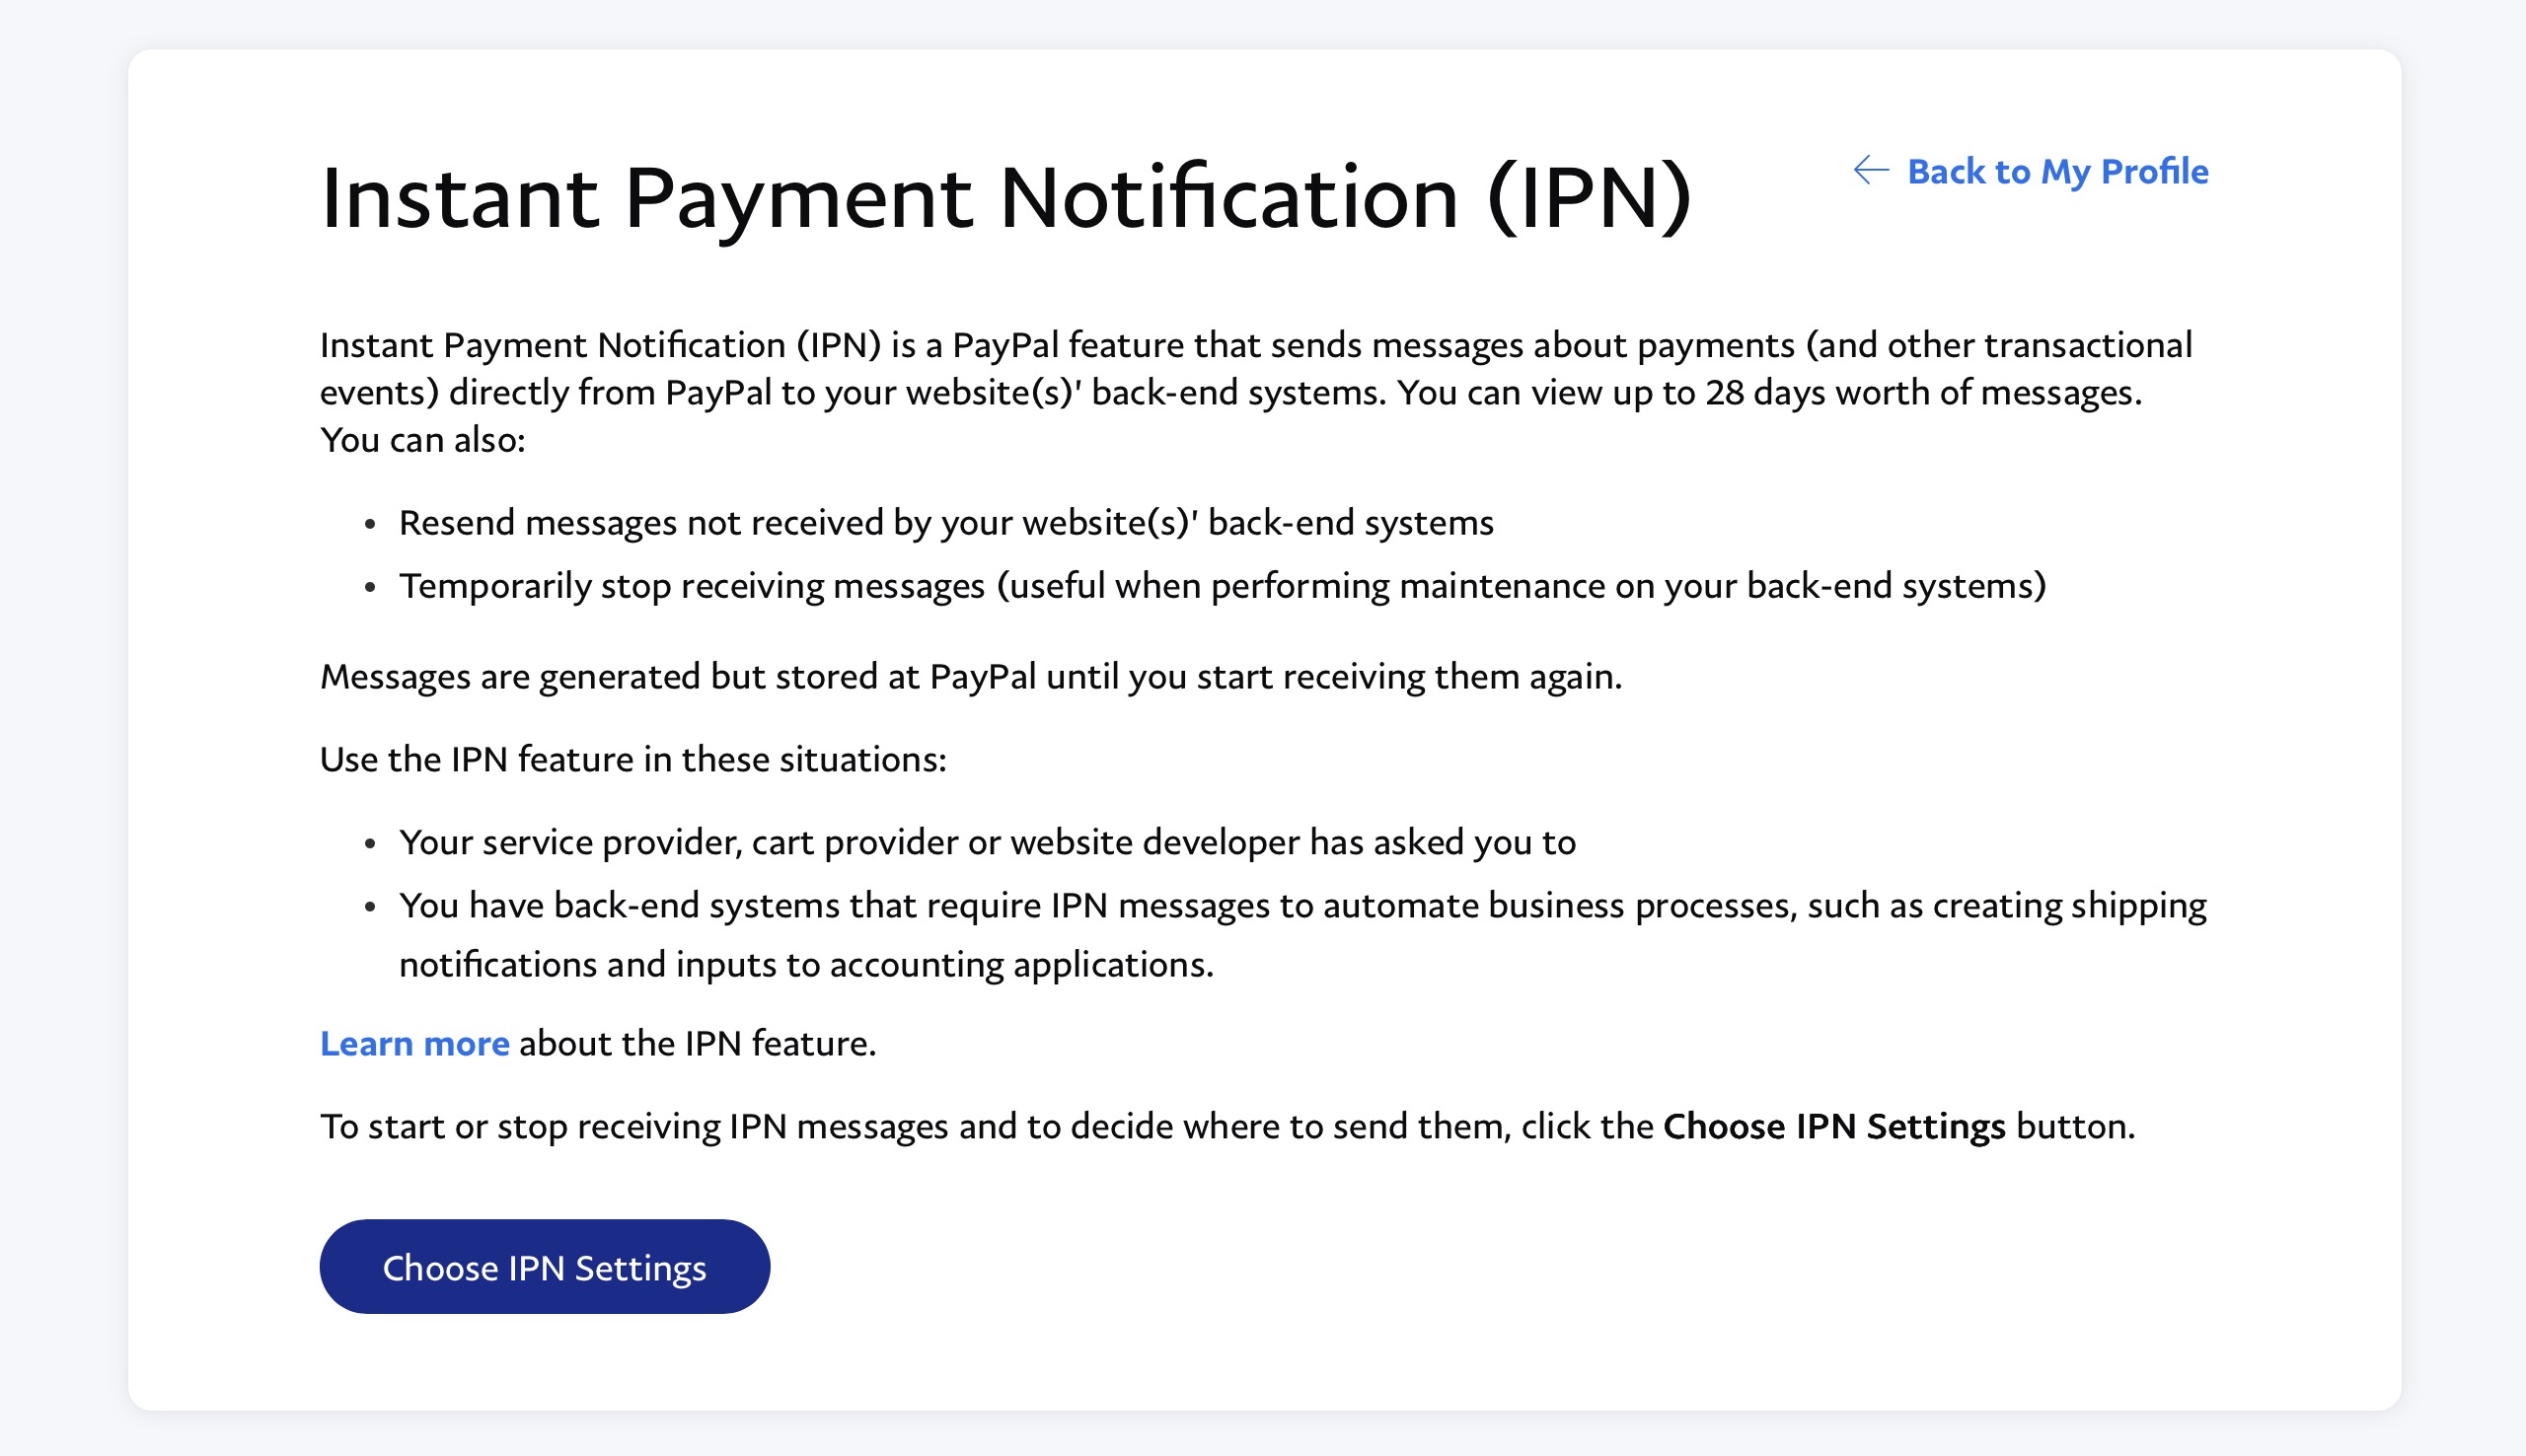
Click the button labeled Choose IPN Settings.
-
You will be asked for a Notification URL. This is the absolute path to the IPN script on your server. You must construct it by appending the backend path to your Base URL. The precise format is:
https://www.yourdomain.com/shop-area/rw/elements/com.travagliante.rt_digital_downloads/php_backend/ipn_paypal.php(Replacehttps://www.yourdomain.com/shop-area/with your actual Base URL).Below the URL, select the radio button for Receive IPN messages (Enabled).
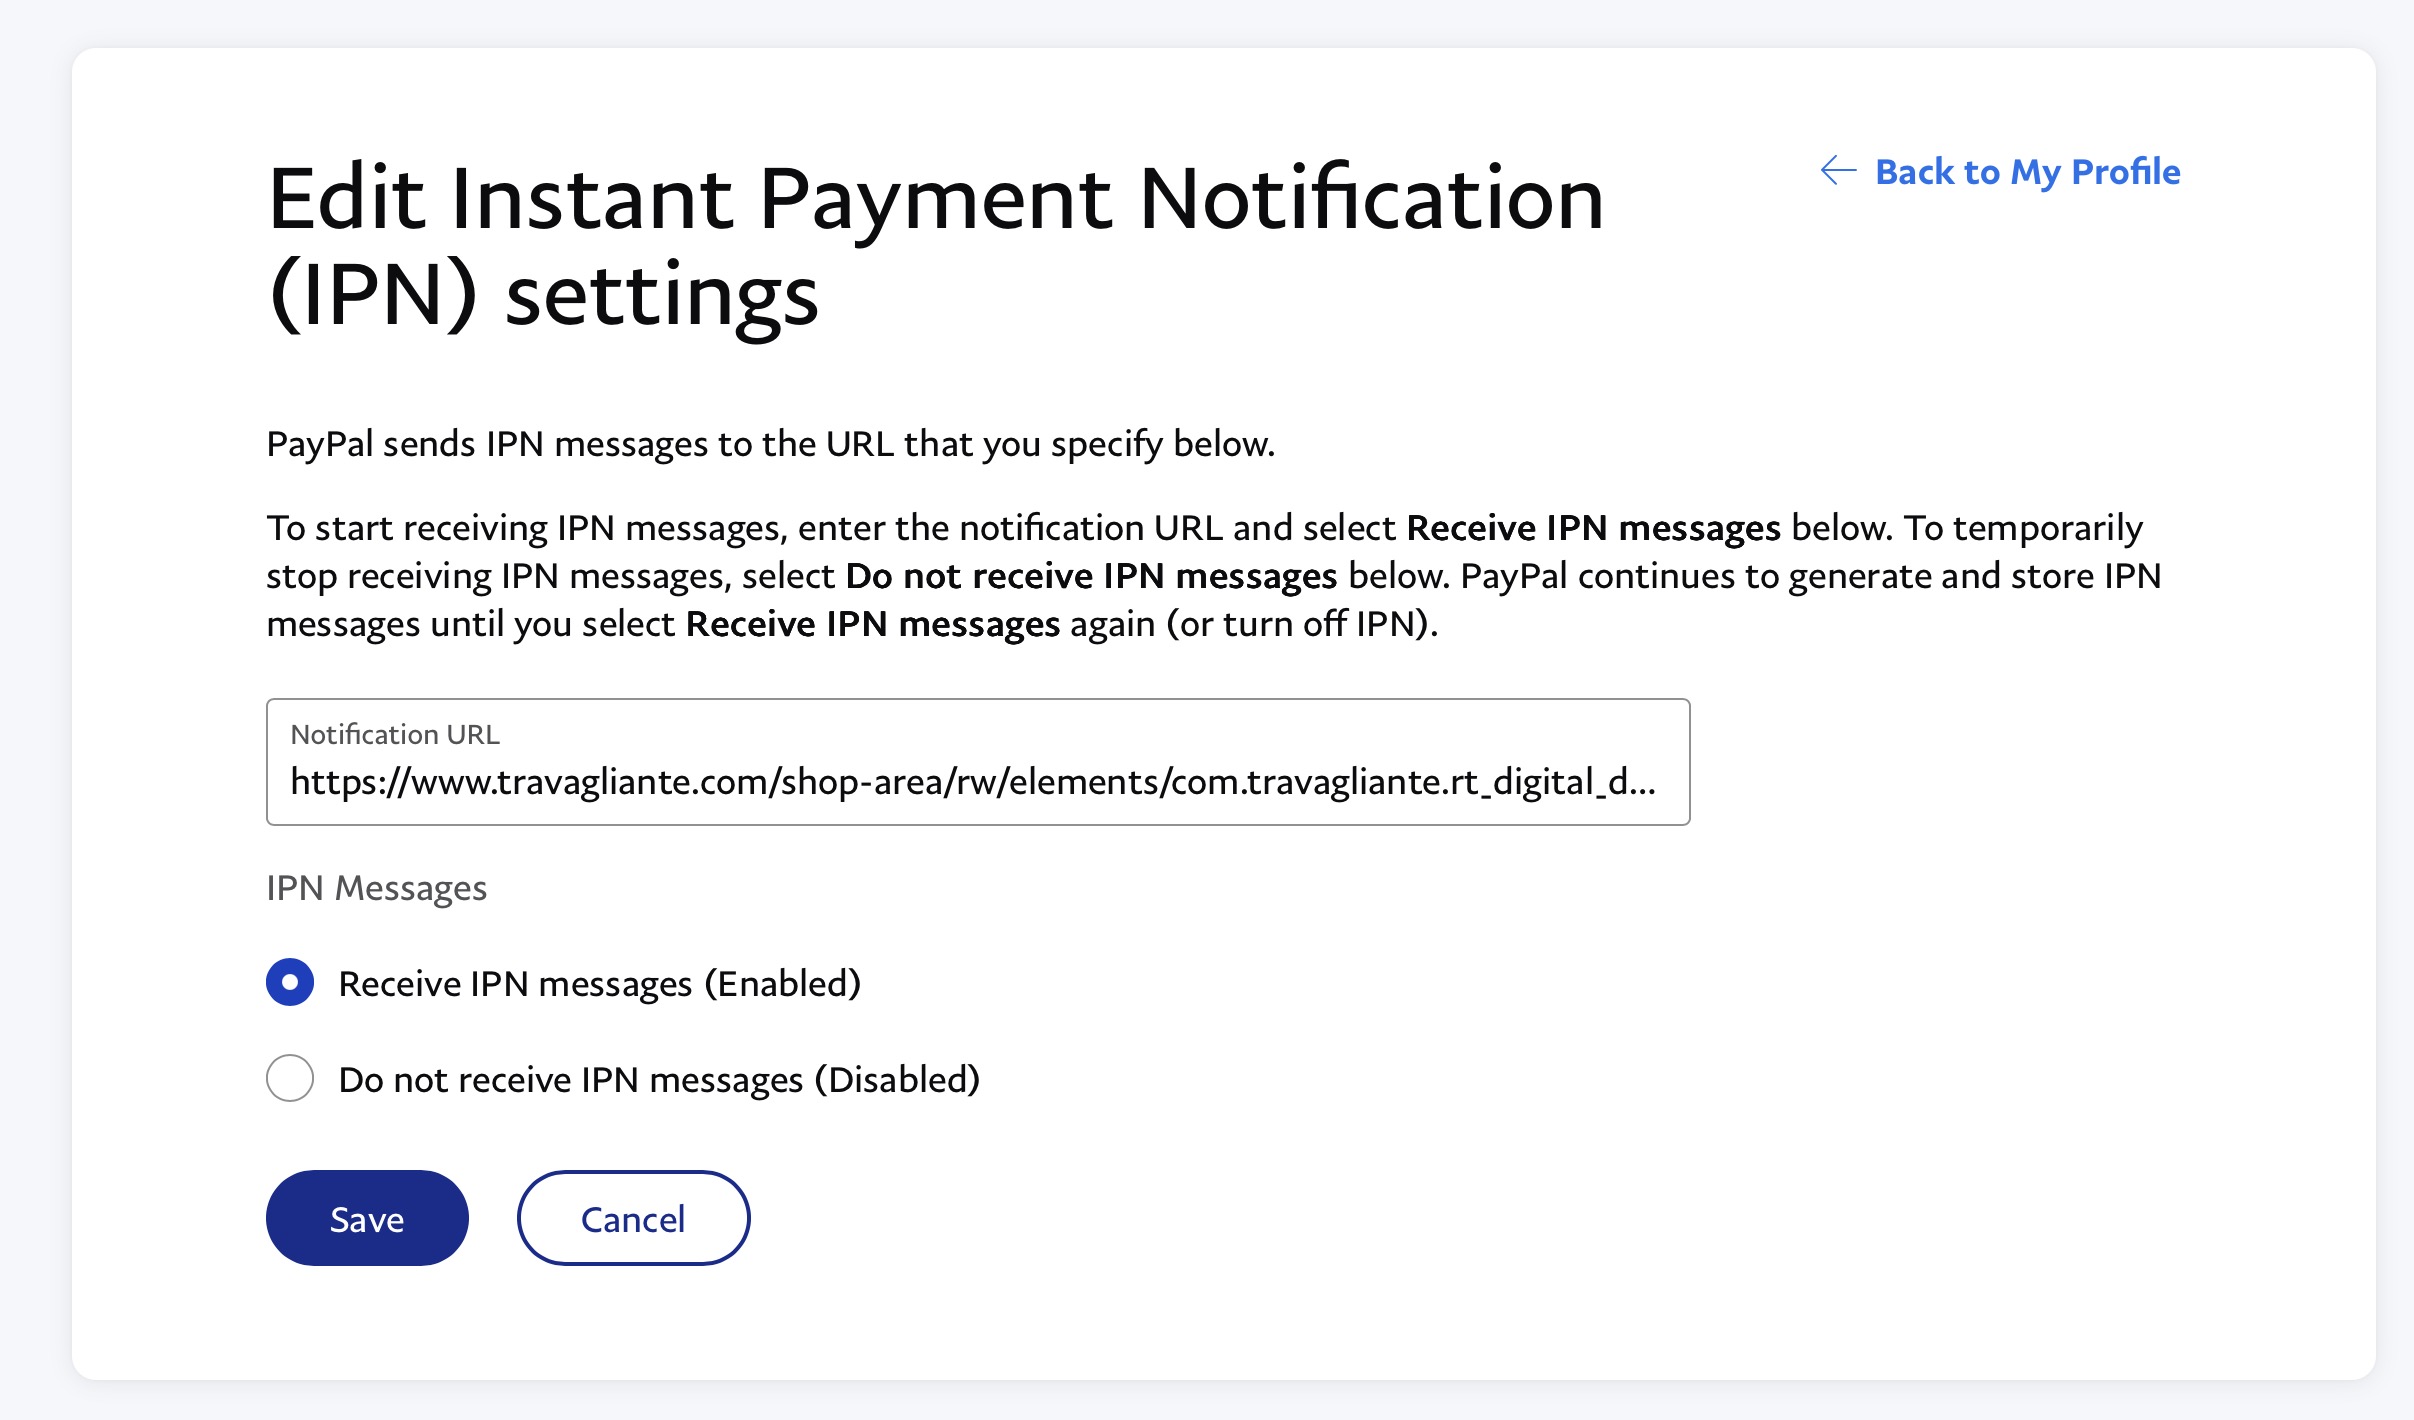
- Finally, click "Save". Now, your website is ready to receive the payment confirmations from PayPal.
Phase 4: Testing and Troubleshooting IPN
Because IPN operates in the background, you need to know how to monitor it.
- Publish your RapidWeaver project.
- If you are using Sandbox mode, you can log into the PayPal Developer Dashboard to create dummy buyer and merchant accounts to test transactions without using real money.
- Execute a test purchase on your live site.
- Check your RT Digital Downloads Order Dashboard. If the order appears, with the respective transaction id, the IPN handshake was perfectly successful. If you see the "Pending payment" message, then the IPN mechanism is not correctly working.